How to Make a T-Shirt Quilt
This DIY shirt quilt video tutorial walks you through making a quilt from old shirts, easy!

Looking for a fun new sewing project? Make your own DIY t-shirt quilt. Our video tutorial and written instructions show you How to Make a T-Shirt Quilt.
This will definitely be everything you could want for your old band, charity, work, or school shirts.
Not only do you get to find a new and memorable use for your old t-shirts that are clogging up your drawers, but you also get to make a super cute DIY quilt that you will love.
Carolina also explains how to make a t-shirt quilt with different sizes so you don't have to find shirts that all match.
Whether you are making this for a DIY gift (it makes a great one!) or you are just looking for a way to find a purpose for some of those old shirts, this t-shirt quilt is exactly what you need.
Sign Up For More Free Patterns >>>
How to Make a T-Shirt Quilt With Different Sizes?
An important part of successful (and easy to make) t-shirt quilts is having everything match in size. However, as we all know, graphic shirts are rarely the same. Some will have big images in the center, others have writing all over the place, etc.
You want to make sure the block size fits all the shirt designs. It helps to find the largest design and use that as the "template" for the others. Use it to figure out the best block size for the rest and cut them to match that size.
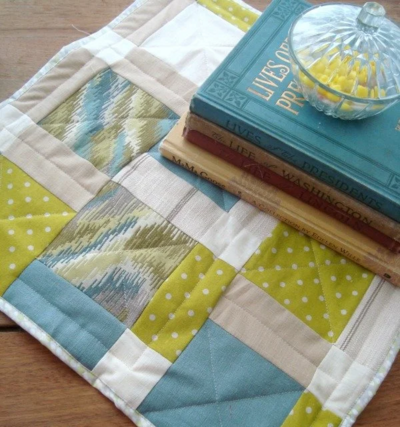
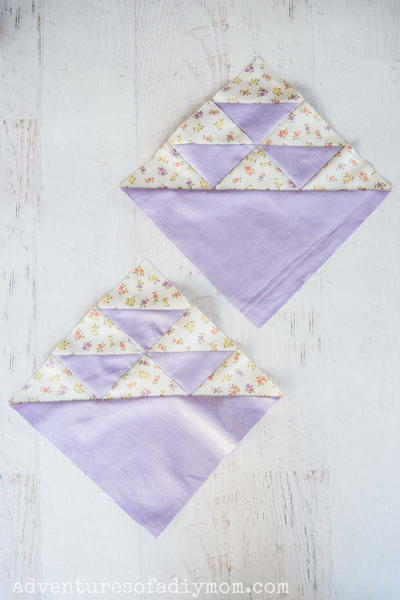
Alternatively, if some shirts have a smaller design or size that won't work, you can add complementary or fun fabric borders to make it the size to match the rest (see the image below).
Carolina will discuss this more in the video, so be sure to give it a watch!

T-Shirt Blanket Materials Needed
- Recycled t-shirts
- Press cloth
- Lightweight fusible interfacing
- Fabric
- Rotary cutter
- Mat
- Ruler
- Iron and ironing board
- Scissors
- Sewing machine
Project Type: Make a Project
Time to Complete: Weekend project
Sewn By: Machine
T-Shirt Quilt Video Tutorial
This sewing video breaks down exactly how to make this quilt pattern, so it is easy peasy for you to complete! Just press the play button to watch! Be sure to scroll down for our written instructions with images to match the steps.
How to Make a T-Shirt Quilt
You have a choice of planning your t-shirt quilt out before cutting up all of your t-shirts or after. Some important things to keep in mind: Do you have enough to make the size you want? Do any of them have designs on both the front and back? Make sure you count both!
- Measure the designs on all of your shirts to decide what the block size for your quilt will be.
Note: If you want to do this after cutting, then do Step 2 first and this step after!


- Take your first shirt and lay it on a flat, solid surface. Cut all the way up one side to the armhole. Cut from the sleeve to the armpit. Cut your top from the sleeve to the neck end, and repeat this process with the other side of your shirt.
Remember: You can use both the front or the back of the shirts or choose only one side for your quilt.


- Cut your pieces of fusible interfacing a few inches larger than your shirt size.
Note: If you are using dark-colored shirts, give yourself at least two inches on either side.

- Use a press cloth (or an old dish towel) and place it over the interfacing to protect it from directly touching the iron. Fuse the interfacing in place using the iron (you'll want to make sure you follow the manufacturer's instructions).

- Measure all sides of each shirt to make sure your design is centered. Cut your t-shirt quilt blocks using a quilt ruler and rotary cutter.

- Repeat Step 5 with all your shirts until you have enough blocks to make the size quilt you would like. Keep in mind your borders and the sizes if desired.
Note: If you don't have enough designs, you can always cut solid pieces of the shirts (the parts or sides without the design) to fill in some gaps.
- Lay out your shirt blocks using a flat surface, such as a floor, table, or design wall. Line up your blocks to decide what pattern you would like them in. Then pin or mark them as needed, and prepare to sew your blocks into rows.

- Put two blocks that will be next to each other right sides together, line up the edge you are going to sew, and then sew from one end to the other.
Note: Any consistent seam will keep your quilt square. This tutorial uses a 1/4-inch seam allowance.

- Repeat this process to make all of your rows.
- Before stitching your rows together, press your seams to one side.

- Sew your rows together by placing one row on top of the other facing each other. Then match up the edges and seams, and pin your seams in place to keep it square. Sew across with your machine, just as you did to sew the individual rows.
Note: DO NOT sew over the pin as it will ruin your machine. Simply go slowly and remove the pin before it reaches the footplate.

- Once all the rows are sewn together to make your t-shirt quilt top, you can create a border if desired. Though it's optional, adding a quilt border will help your quilt become more square and give it a finished look.
To add a border: Measure both sides of your quilt. It may be uneven, but, either way, you will add the two numbers up and then divide it in half to determine the border width. Do the same for the top and bottom. Then stitch the borders on.

- Quilt and bind your t-shirt quilt and you are good to go!

Want More?
What to Make with Old Jeans >>
What type of t-shirts do you want to use for your new shirt quilt?
Let us know in the comment section!
Read NextBirds In The Air Quilt Block
Your Recently Viewed Projects


Thanks for your comment. Don't forget to share!
Report Inappropriate Comment
Are you sure you would like to report this comment? It will be flagged for our moderators to take action.
Thank you for taking the time to improve the content on our site.