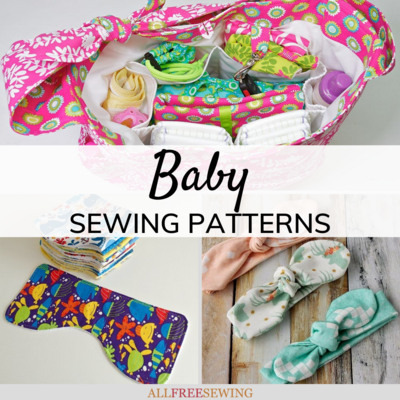
Floral Stroller Bag Pattern
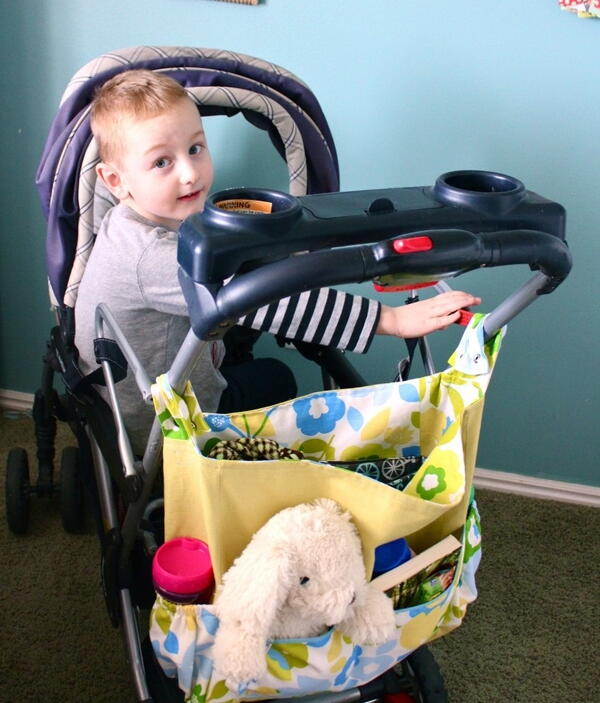
This awesome stroller caddy pattern results in a pretty floral DIY stroller bag that attaches to the back and holds everything you need while walking!

Use this free stroller bag pattern to create a bag large enough to carry everything you need for long walks with the kids.
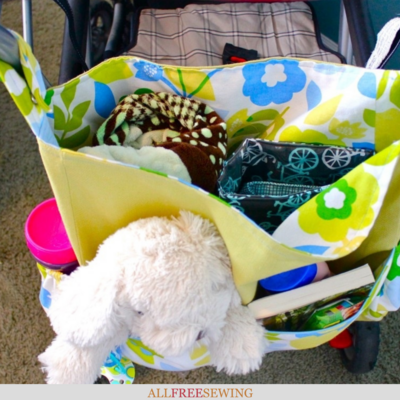
This stroller travel bag includes multiple pockets so everything has its own place. What more can a new mom ask for?
Not to mention, this Floral Stroller Bag Pattern is cute too! We love the bright look of the floral fabrics she used but it would look just as great in any of your favorite fabrics.
This easy-to-follow stroller caddy pattern results in a DIY stroller bag that attaches to the handles and holds everything you need. With spacious and nearby openings, all your necessary items are at arms-length and can be grabbed while walking.
More importantly, it holds everything you need so you can have a successful trip no matter where you're going.
You can also watch Maureen Wilson lead you through each step towards creating this project in the video tutorial found at the bottom of this page.
DIY Stroller Bag
Materials:
• 1-1/2 yd patterned home-decor weight fabric
• 1 yd solid home-decor weight fabric
• 1/3 yd 1/2-inch elastic
• 2/3 yd double-fold bias tape
• Set of 5 heavy-duty snaps
Note: Measurements are for non-directional 45-inch fabric. Adjust accordingly.
Start by cutting your fabric. I’ve chosen a patterned fabric for my lining and pockets, and a solid for the outer bag.
Patterned Fabric:
• 18 x 15 in. (cut 3, lining front / lining back / big pocket)
• 6 x 15 (cut 2, lining sides)
• 18 x 6 (cut 1, lining bottom)
• 9 x 15 (cut 2, lining side pockets)
• 4 x 18 (cut 2, snap tabs)
• 2 x 8 (cut 1, key loop)
Solid Fabric:
• 18 x 15 in. (cut 2, outer front / outer back)
• 6 x 15 (cut 2, outer sides)
• 18 x 6 (cut 1, outer bottom)
Floral Stroller Bag Pattern Instructions
Floral Stroller Bag Pattern - Lining:
- We’ll begin with the bag lining. Sew the 6 x 15 inch side panels to the 18 x 6 inch bottom panel, sewing one to each short end with right sides together. Sew with a 5/8 inch seam. Press the seams open.
- Now we’ll pin one of the large 18 x15 rectangles to the strip we sewed. Line up the short side of the large rectangle with one of the outer strip segments. Right sides should be together. Pin.
When you reach your seam joining the strips together, it’s time to turn the strip and pin it along the long side of the main piece. Your corners should look like this. When you reach the next seam, turn again and pin the remaining side strip to the other short side of the main piece.
- Sew the sides and bottom in place with a 1/4 inch seam. When you reach a corner, tug gently on the fabric diagonally; you want the corner to be free of pleats. Press open seams.
- Finally, add the other main piece by pinning it to the rest of the bag, right sides together, matching up the edges. Sew with a 5/8 inch seam. Press the seams open. Snip off the excess fabric at the corners, being careful not to cut your stitches. Set aside.
Floral Stroller Bag Pattern - Side Panels and Pockets:
- Find the two solid side pieces that measure 6 x 15 inches. Fold them in half so they measure 6 x 7-1/2 inches and press along the fold. The pattern should be on the outside. Now we’ll sew a seam a half-inch below the fold to create a casing for the elastic.
- Change your machine to a basting stitch, or the longest stitch available. Sew along the bottom raw edge of the side pocket pieces with a 1/4 inch basting stitch. Do not backstitch. Gently pull on the bottom thread to ruffle the fabric. Adjust the fabric so that it fits the bottom of the side pocket panel. Pin in place, lining up the raw edges of both pieces.
- Now we’ll need the elastic. Cut 6 inches of elastic for each pocket. Use a safety pin to thread it through the casing. Pin the sides of the pocket panel to the side panel. Pull the elastic taut so that the pocket panel fits the dimensions of the side panel. Pin the ends of the elastic to the sides of the pocket piece.
- Sew the sides and bottom of the pocket to the side panel with a 1/4 inch stitch, leaving the top open. Do this for both sides.
Floral Stroller Bag Pattern - Key Loop:
- Next we’ll make a key loop so you have a place to hang your keys, or maybe a pacifier. Fold the 2 x 8 patterned piece in half lengthwise so it is 1 inch wide. Sew along the raw edge with a 1/4 inch seam. Press the seam open.
- Turn the tube right side out (you might find it helpful to use tweezers). Center the seam and press.
- Tuck in the raw edges of one end 1/4 inch. Don’t worry about the other end, it won’t show. Topstitch shut with a 1/8 inch seam, and continue topstitching around the edge of the tube.
Floral Stroller Bag Pattern - Front and Large Divided Pocket:
- Next we’ll work on the front piece and its large divided pocket. Take the remaining patterned rectangle that measures 18 x 15 in. and fold it in half so that it measures 18 x 7-1/2 inches. The pattern should be on the outside. Press the fold. Cut a piece of bias tape to 18 inches, and press if needed.
- Line up the raw edge of the key loop piece with the top of the pocket piece’s fold. Place it about 4 inches in from the left edge.
- Open the bias tape and pin it along the folded edge of the pocket piece. Sew the bias tape in place, encasing the raw end of the key loop.
- Now we can add the pocket to the main piece. Lay it on top of a solid 18 x 15 rectangle and sew along the sides and bottom, leaving the top open. Then, divide the pocket by sewing a seam directly up the center of the pocket.
Floral Stroller Bag Pattern - Assembling Outer Bag:
- Assemble the outer bag as you did the lining. Pin the side pieces to the short ends of the bottom piece and sew with a 5/8 seam. Make sure that you are sewing along the bottom of the pockets. Press the seams open.
- Pin the side & bottom strip piece to the front bag piece. Sew with a 5/8 in. seam. Then sew the remaining 15 x 18 inch rectangle to the bag. Press open the seams.
Floral Stroller Bag Pattern - Snap Tabs:
- Fold the two patterned 4 x 18 rectangles in half, right sides together, so that they are 9 x 4 inches. Press. Sew around the edges with a 1/4 inch seam, leaving the unfolded short end open for turning. Turn right side out and press.
- Pin the snap tabs to the top center of the outer side panels. Rather than lining the strap end up with the top of the bag, extend them about 1-1/2 inches past the bag. This will allow us to sew it more securely later.
Floral Stroller Bag Pattern - Finishing the Bag:
- With the lining of the bag inside out, slide the outer bag inside of it. Right sides should be touching. Line up the side seams of the bag and pin all the way around. Sew with a 5/8 seam, leaving a 10-inch hole for turning.
- Press open the seams. Turn right side out.
- Press the top seam. Fold in the edges of the hole and press those as well.
- Topstitch the hole shut with a 1/8 inch seam, and continue topstitching all the way around the bag. I also decided to topstitch around my snap tab pieces as well.
- To strengthen the snap tabs, sew a rectangle with a 1/4 inch away from the top seam.
- Finally, attach two heavy-duty snaps to each of the tabs, and one to the key loop as well.


Floral Stroller Bag Video Tutorial
Visual learners, rejoice! If you prefer videos to written tutorials or want both to fully understand the project, simply press play on the button below and you'll be set!
Want More?
46+ Free Doll Clothes Patterns >>
What's your favorite baby-themed accessory?
Let us know in the comments!
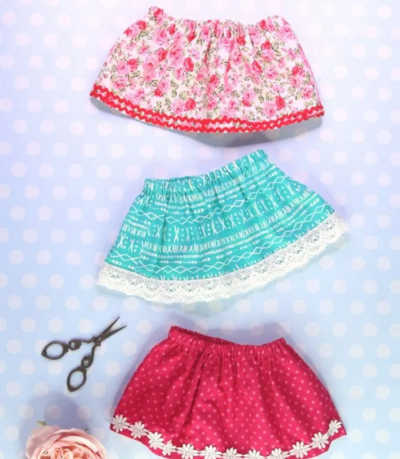
Read NextBaby Skirt Pattern
Your Recently Viewed Projects
Thanks for your comment. Don't forget to share!
onecraftrose 03496 47
Jul 09, 2013
I believe there is an ERROR in the instructions or in the size of the side pocket. It says cut printed fabric 9 x 15 (cut 2, lining side pockets) but in instructions said it should be 6 x 15. Since you never use the 9x15 piece I figured that is the one that should be the side pocket and the 6x15 solid, outer sides is what I attached the 9x15 pocket to. Would like to know if it should have been a 6x15 piece, but since you gather the entire thing, it didn't matter that much.
trishaslp 3538184
Apr 13, 2013
I do wish the directions for the pattern pieces showed which direction to lay them out. My fabric is directional, and I don't want to cut it out sideways.
gayle Link
Mar 26, 2013
I made this bag & it looks awesome. The only things I did to change it was I put a toy pocket on the back of the bag with a rattle holding strap. Plus I gathered both ends of the bag across the top with elastic so it is harder for would be thief to get their hands into. Thanks for the pattern. I will definitely make another few for friends having babies.
hueysgirl90 290428 3
Feb 08, 2013
Just printed pattern. My Grandaughter loves to make item like this. She makes and sells alot of the items to make her own spending money. I can not wait until we try this one. Cricket 7019733
justmenbean 686749 1
Feb 05, 2013
I am still confused with the side pocket. Are there directions missing from the cut listing??
SuzannesSensations
Sep 16, 2012
Thanks so much for the great bag and the tutorial I would like to point out that there is an error in the written text and the verbal text of the tutorial where the side pockets are explained The actual photo portion of the video is correct just the verbal and written parts are incorrect It tells you to get the solid side panels and fold them in half and proceeds to tell you how to make the side pockets but it neglects to tell you to get the printed pieces that are actually used for the pockets I'm sure this is just an omission but it certainly messed up my bag until I realized what had happened from looking at the actual video I ripped out the casing for the elastic and the gathered bottom edge on the solid piece and did those things to the printed piece and then…Read More assembled the printed pocket to the solid side panel and everything went smooth from there on out
Report Inappropriate Comment
Are you sure you would like to report this comment? It will be flagged for our moderators to take action.
Thank you for taking the time to improve the content on our site.