DIY Denim Flower Hair Clip
Make your own flower hair clips using bleach and old jeans. This stylish DIY hair accessory is perfect for girls.

Learn how to make hair accessories out of denim using tie-dye and floral inspiration. Tie-dye has been around for decades, and this season it's more popular than ever.
There are so many ways to customize your wardrobe with this fun craft technique- the possibilities are literally endless. For this tutorial, let's make a floral hair accessory using a modern twist: upcycled denim!
This DIY Denim Flower Hair Clip is a great way to make use of an old pair of jeans that you don't wear anymore. Once you learn how to make denim flowers, you will want to find all the old jeans and denim you have around.
You will definitely enjoy making this free-spirited flower clip tutorial on a warm day outside! It's a fantastic summer project for anyone who wants to DIY a creative and retro hair clip.
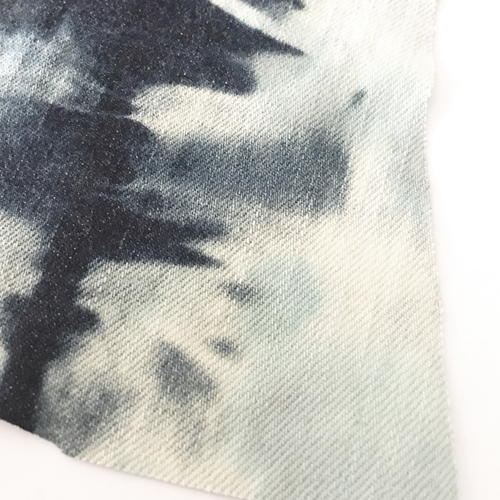
Bleaching denim is a creative way to tie-dye, too. This tutorial is in two parts: preparing the denim with bleach and then turning the tie-dyed jean into a beautiful flower hair clip.
We love the combination of bleaching denim and turning it into a unique hair accessory that anyone would love to sport on a summer day.
Sign Up For More Free Patterns >>>
Project TypeMake a Project
Time to CompleteWeekend project
Sewn byHand

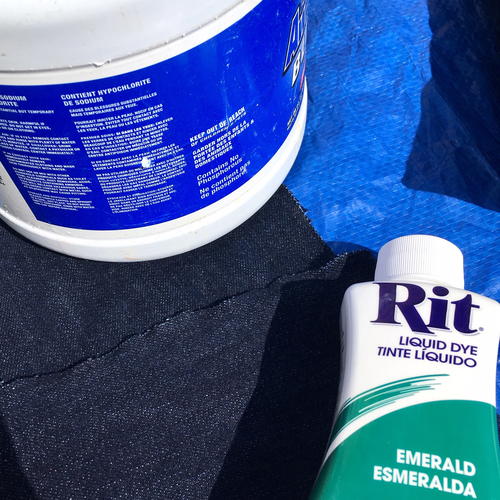
Materials List
- Denim fabric (I used an old pair of jeans and cut long panels out, removing the seams)
- Rubber bands (about 10-15)
- Fabric scissors
- Sewing thread (in dark and light blue)
- Hand-sewing needle (small or medium size)
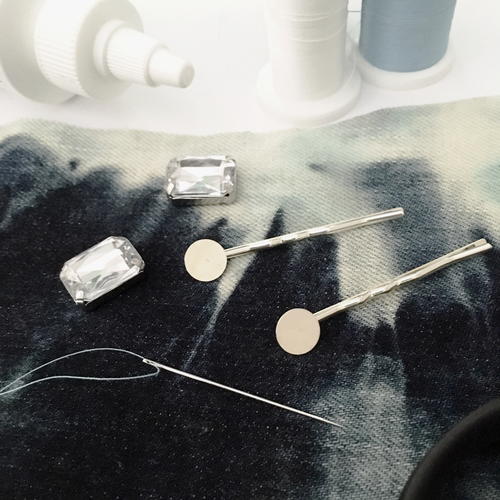
- Hair clip, pin, or comb
- Large plastic sew-on novelty jewel or sparkly button
- Bleach
- Measuring tape or ruler
- Fabric glue
- White vinegar (a large cup full or a bottle)
- Dishwashing gloves (dispose of after use)
- Large plastic bowls, pots, or buckets
- Powdered or liquid fabric dye (optional)
For more similar accessory ideas, be sure to check out our collection,
Tie Dye Denim Flower Hair Clips DIY
Notes:
- Approximate time to complete: 1 day (this includes time for the bleaching, washing, and drying of the fabric).
- Click on any image below to enlarge.
- I recommend working on the tie-dye part of this project outdoors because it can be a bit messy. A table covered with a drop cloth is the perfect workspace, and have dishwashing gloves, an apron or old clothing, paper towels, and a bag for garbage available.
- Be careful not to get the bleach or dye on your skin or clothing and work in a well-ventilated area.
- Once you've bleached (and dyed your fabric if you choose to), let it dry for a while outside and then run through the washing machine and dryer to get rid of the smell and take out any wrinkles.
- You should run a cleaning cycle in your washing machine after this to get rid of any residue.
- After your fabric is washed and dried you can complete the hair clip indoors if you prefer.
- Use bowls or storage tubs that you won't be reusing for food in the future, and throw away the gloves at the end of the project. Also, be sure to always properly dispose of your dye and bleach according to the instructions on the packaging.
How to Tie Dye Jeans with Bleach:
This method will help you with most tie dye jeans patterns, so it's helpful whether you're making this DIY hair clip or something else. Read through the directions below to see how it's done.
-
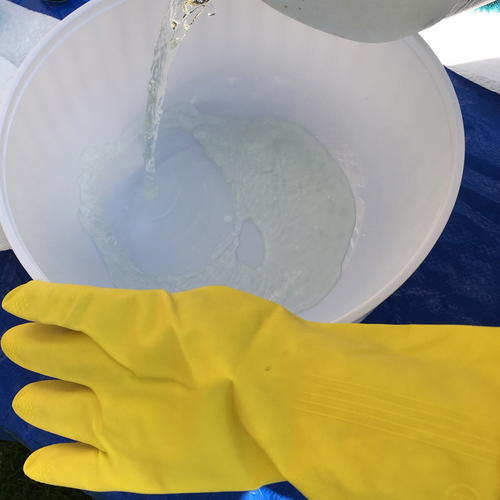
Lay out all of your materials for the tie-dye process on your outdoor workspace. This includes your denim fabric, rubber bands, bowls for bleach and dye, a large bowl of water, gloves, a bottle of bleach, dye, and paper towels.
-
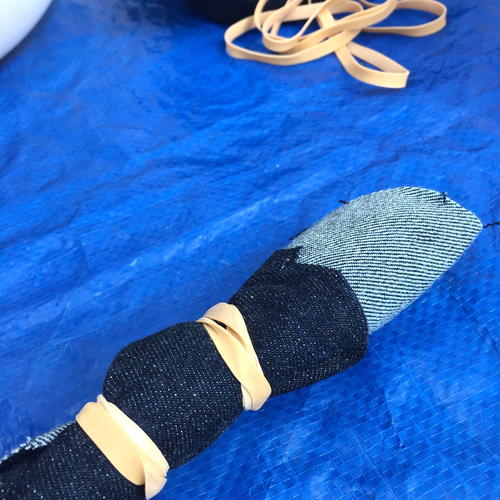
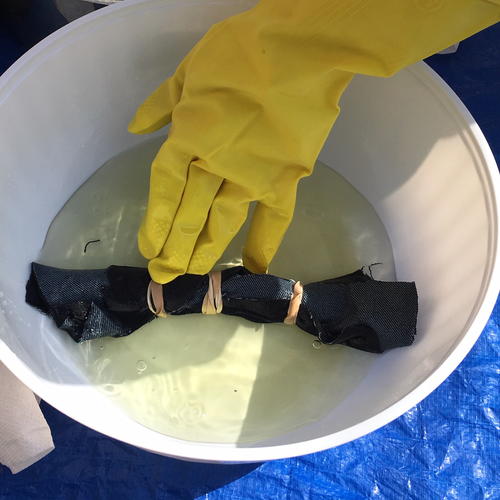
Now it's time to tie your fabric! I suggest using about 3-5 pieces of denim and banding them in different ways- some rolled up and bands placed at intervals, and some bunched randomly. There's a bit of trial-and-error involved. Make sure your rubber bands are fairly tight so that the bleach doesn't get underneath them.
-
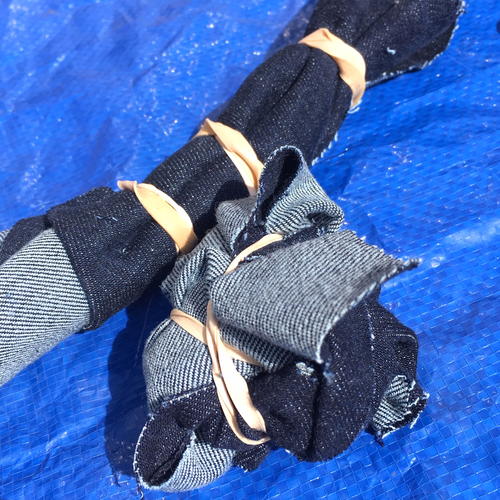
Once your fabric has the rubber bands attached, gently pour bleach into your bowl or storage tub until it's about half full. It should be full enough that you can submerge your fabrics, but not so much that you can't move the bowl without it spilling.
-
Put on your gloves for the next few steps. Place your tied denim pieces into the bowl of bleach, making sure they are totally submerged. Leave the fabric in there for about 20-30 minutes, checking about every 5-10 minutes and turning them over until the color is much lighter.
-
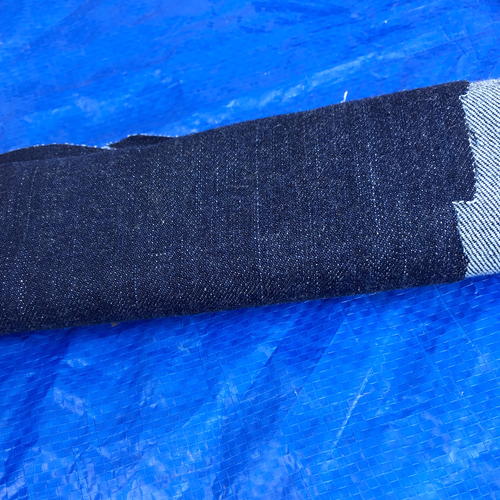
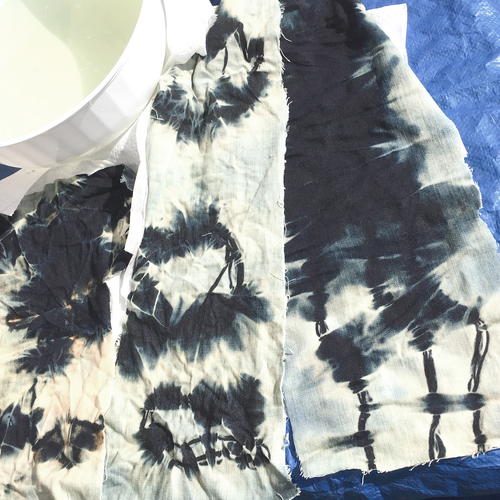
Once your fabric is sufficiently bleached, untie (or carefully cut off) the rubber bands and unfold the denim.
-
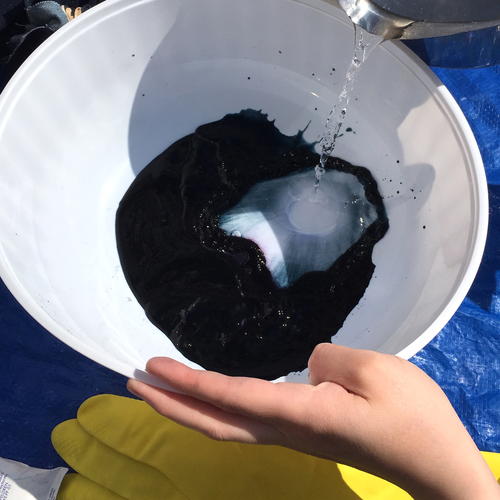
This next step is optional. I made a custom color of fabric dye- mixing a dark blue powdered dye with a dark green liquid dye to get a turquoise blue color. You can use whatever color you'd like to add contrast- pink, red, and orange would all look really cool on the tie-dyed denim.
Follow the instructions on the packaging (for this brand I used hot water as recommended to dilute the dye). The dyeing step should be done in a separate container or bowl than the bleach. You can either dip random parts of your bleached fabric into the dye or use your gloved hand to drip a bit onto the lighter areas of your denim. -
After you've achieved the colors you want, rinse your fabric in another bowl with water and white vinegar. It will help stop the dyeing process and rinse away some of the smell and excess color and bleach.
-
After it's dried outside for a while, wash and dry your denim material in your washing machine. Do this separately so it doesn't bleach or dye your other clothing, etc. It might require more than one cycle to get the bleach smell out of the fabric. This step will also get the wrinkles out from the tie-dye process.

Denim Flower Hair Clips DIY:
Once you're finished tie-dying and drying, it's time to cut out and assemble your denim flower! Again, follow these directions to make your own version.
-
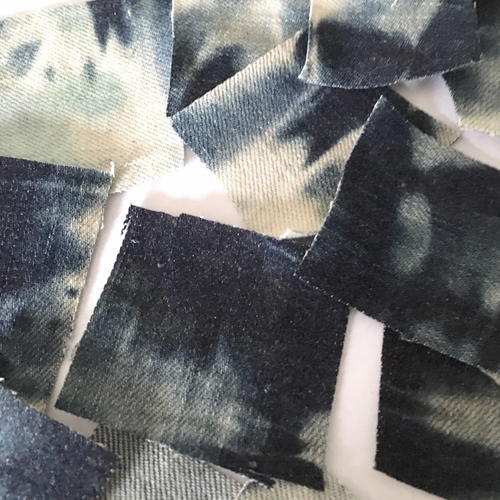
Set your tie-dyed fabric out on your workspace and see which areas are the most aesthetically pleasing. Have your fabric scissors and other supplies nearby.
-
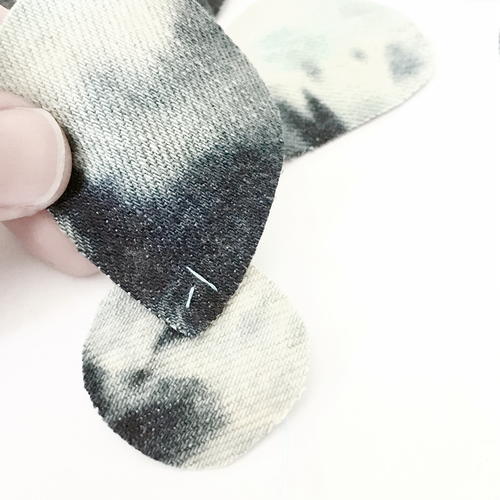
Cut your tie-dyed fabric into squares that are at least 2" or so on most sides. They don't have to be exact, you just don't want them to be too small. In the next step, you will refine the shape so they look like flower petals.
-
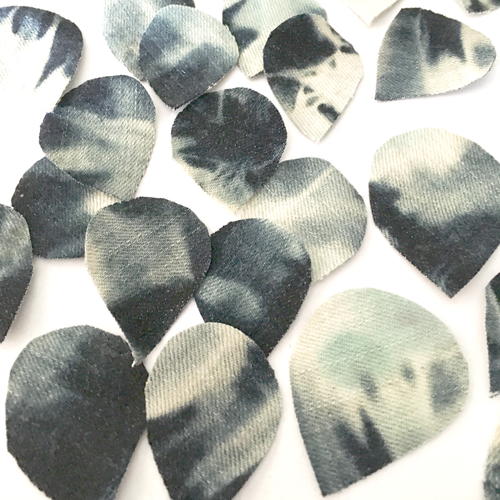
Trim your squares into 1.5" and 2" long petals. They don't have to be perfectly even, just similarly shaped. Make some that are on the larger side and some smaller. I tried to work around the dyed parts that had the most contrast and interesting patterns.
-
Cut out a base piece to sew your petals onto. It should be about 1.25" - 1.5" wide. You can use any color piece of denim as it will be hidden.
-
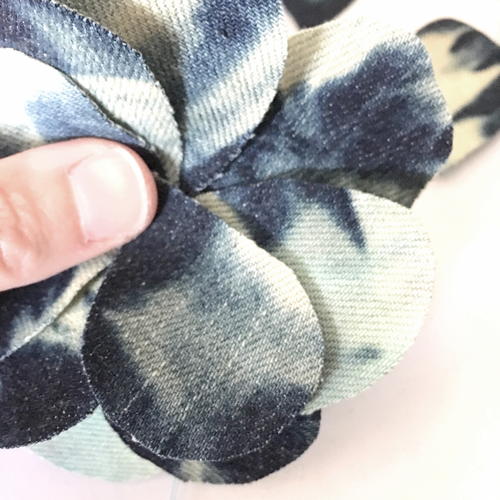
Next, choose the petals that have the prettiest tie-dye patterns and colors on them for your flower. Using your sewing needle, attach your larger petals onto the round base piece. Work in a circle and slightly overlap some of the petals. Start with about 6 or 7 evenly placed petals for the bottom layer.
-
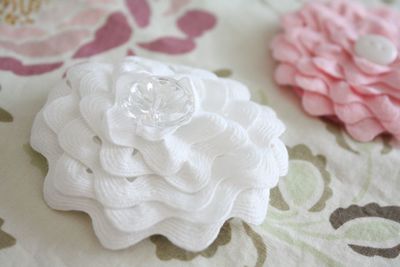
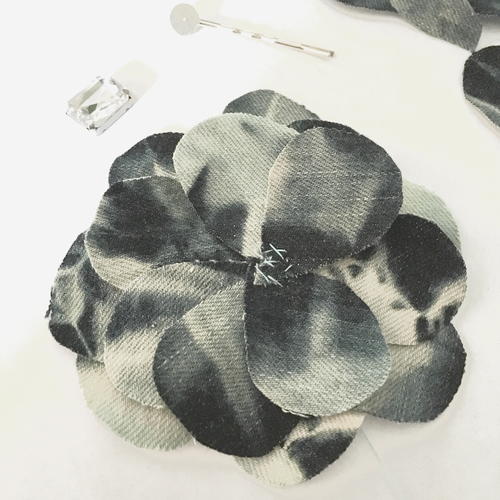
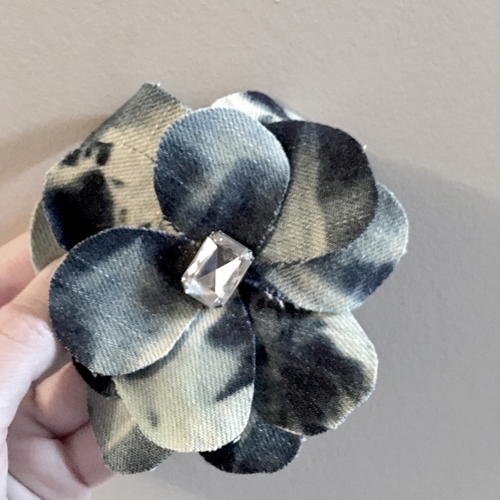
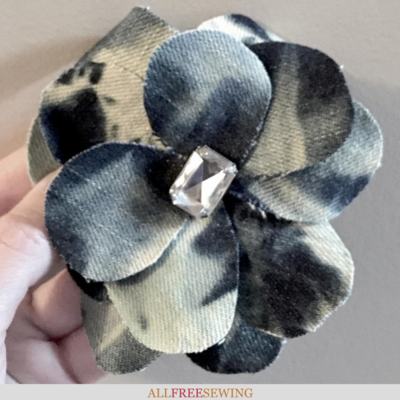
Continue adding the smaller petals in staggered layers on top until you have a full flower. I used about 14 total for this denim flower.
-
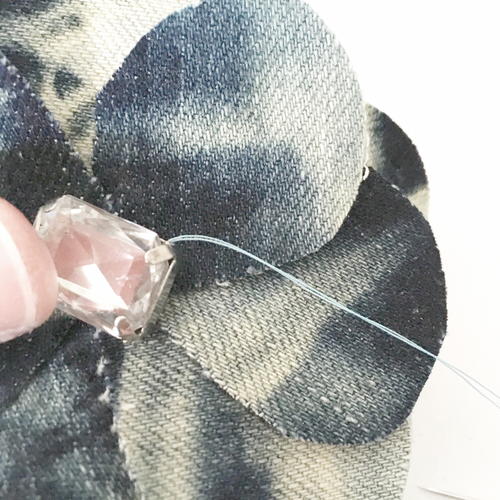
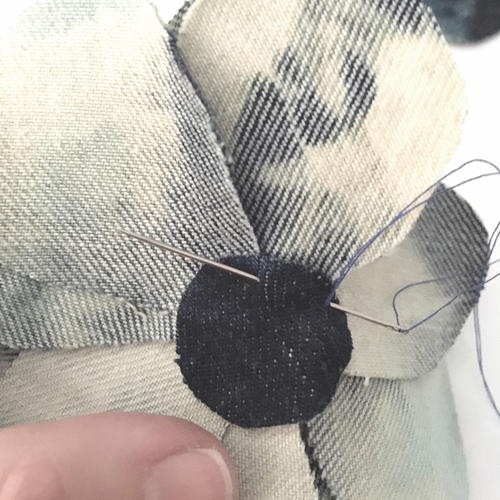
Sew your large novelty jewel or button onto the middle of your flower. Make sure it covers up the stitches and is centrally placed. You can sew through to the other side because we will be covering the stitches in the next few steps.
-
Trim the excess base piece on the back of the flower, avoiding cutting any of the thread or petals.
-
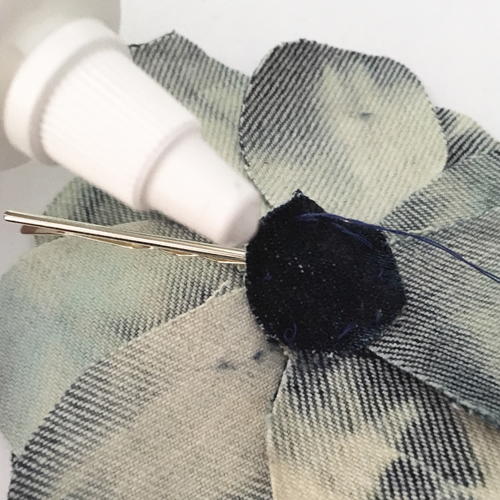
Take a small round piece of your fabric (about 1" across) and stitch it onto the back of your denim flower. Stitch almost all around, but leave a space for the hair clip to be placed in here. I switched to a dark blue thread to blend into the fabric, so adjust your thread to the color of the piece you are using.
-
Add a small amount of fabric glue into this little pocket you've created, then insert the hair clip.
-
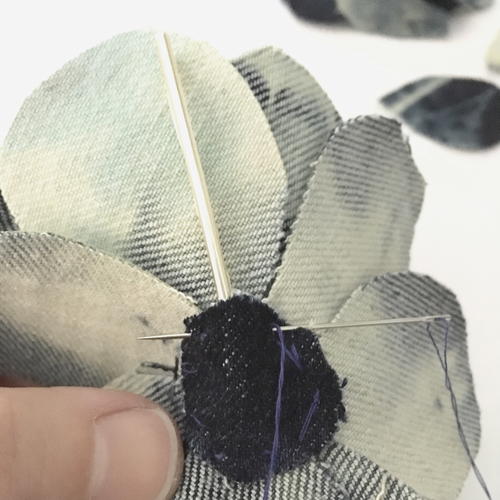
Finish attaching the small round panel to the back of the flower by stitching around where the clip is inserted. Make sure it's snug and that the clip won't come out when you're wearing it.
-
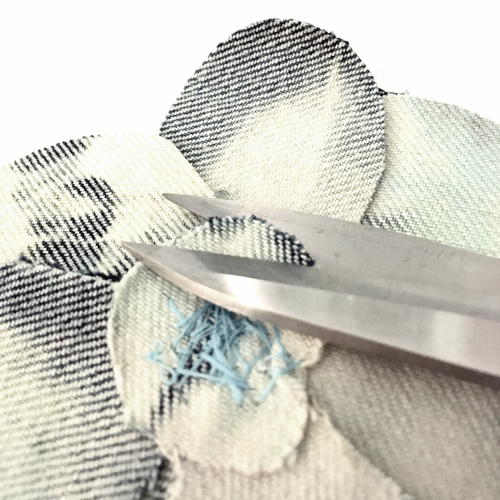
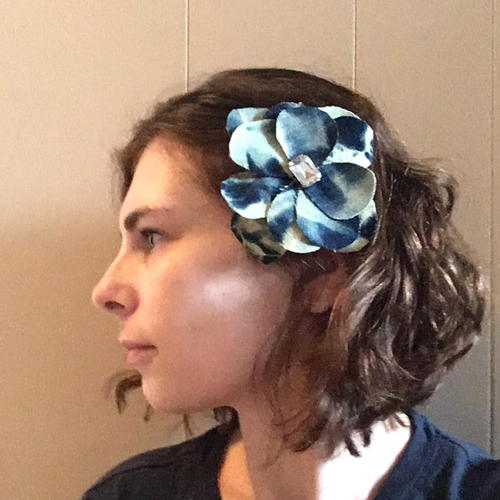
After letting the glue dry for a few hours, check for loose petals and trim any stray threads. Now your groovy new hair accessory is ready to wear!

Up Next:
Read Next30 Minute Butterfly Bow
Your Recently Viewed Projects
Thanks for your comment. Don't forget to share!
KLC
Jun 12, 2019
This is such a cool idea. I love the look of bleached denim and making it into a flower is even better!
Report Inappropriate Comment
Are you sure you would like to report this comment? It will be flagged for our moderators to take action.
Thank you for taking the time to improve the content on our site.