How to Make a Pillow Pet

You've seen these popular pillow pets everywhere. Now you can make a homemade pillow pet using this free sewing pattern for pillow pets! It's so simple to make this pillowcase and it's easy to remove for washing. The kids will love this cute project, and in addition to making a great gift, this is a great, easy sewing project to wind down with at the end of a long day or a long week. Watch Maureen Wilson lead you through each step of this project in the video tutorial below.
Project TypeMake a Project
Time to CompleteUnder an hour
Sewn byMachine

Materials List
- 1 yd. fuzzy knit
- 1/3 yd. fleece (face & feet)
- Doll eyes (optional, you could use fleece)
- 2-inch craft pom (nose)
- Embroidery floss & hand needle (mouth)
- Poly-fill
- Pillow to cover
Pieces to Cut:
Top: Pillow width + 1 in. x Pillow length + 1 in. (Measurement #1)
-
Back Left & Right: Measurement #1 + 12 in., cut in half vertically
-
Head: Trace dinner plate, cut 2
-
Muzzle: Trace bowl or saucer, cut 1 (fleece)
-
Straps: 4 x 8, cut 2
-
Feet: 5 x 5, cut 4, then cut diagonally for 8 triangles (fleece)
-
Tail: 4 x 7, cut 2
-
Ears: 3 in. at base, 7 in. long, cut 2 from pattern and 2 from fleece
-
Velcro: 5 inches of 1-inch Velcro
How To:
First let’s talk about fabric. I’ve chosen a fuzzy knit print. Choose one that has some stretch to it. If you are looking for it at the store, the name brand for this style is called Minky.
I’m using fleece for my face, inner ears, and feet. Fleece is a good choice because it won’t fray, and it has a little stretch to it. If you’d like, you can make the entire pillowcase out of fleece.
Face:
We’ll start with the face. I traced a large dinner plate for the head, and cut two. Then I made a muzzle by tracing a bowl onto felt.
-
Pin the muzzle to one head piece, a couple of inches from the bottom edge. Sew in place using a zig-zag stitch. (A zig-zag stitch allows the fabric to stretch a little more.)
-
Give your pillow pal some eyes. I’m using a set of safety doll eyes, but you could sew fleece or button ones if you’d rather.
-
Next make a mouth. I’m sewing one on with red embroidery floss, using a backstitch. However, you could also choose to cut one from fleece and sew that on.
-
Add a 2-inch craft pom for the nose. Be sure to sew it on very well, because it’s certain to get tugged on.
Ears:
Now we’ll move on to the ears. I cut 4 raindrop shapes for my ears, two from my print and two from fleece. You can change the shape if you’d like… you could easily turn this into a cat or a bear by making triangle or circle ears instead.
-
Pin the print and the fleece pieces right sides together and sew, leaving the base of the ear open for turning.
-
Notch the seams, being careful not to snip your stitches. Turn right side out.
Head:
Pin the unsewn base of the ears to the head. Be sure the ears are pointing inward. Print should be facing up.
-
Then, lay the other head circle face-down on top. Pin in place. Sew around the circle, leaving a 3-inch hole for turning at the bottom.
-
Turn right side out and stuff with poly-fill. Hand-sew the hole shut using a blind stitch.
Pillowcase Front:
Measure your pillow, and add one inch to the dimensions. We’ll call this Measurement #1. Cut one print piece to those dimensions. For example, my pillow is 25 inches long and 18 inches wide. So I’m cutting my fabric to 26 x 19 inches. (My pillow is only a couple of inches thick, and since this fabric stretches, I’m not going to add extra fabric for the height. If your pillow is very fluffy, you may want to cut your fabric a couple of inches larger to accommodate.)
Pillowcase Back:
Cut a piece for the back that is Measurement #1, plus 12 inches wider. (For example, mine was cut to 25 inches long and 30 inches wide.) Then cut this piece in half vertically. (Giving me two pieces that are 25 x 15 inches.)
-
Fold in one long edge a half inch, then fold over itself again, encasing the raw edge. Pin in place. Do this for the other back piece as well.
-
Sew each of the back pieces along the long folded edge to secure.
Velcro Straps:
Next we’ll make the straps. (When the straps are together, it gives the Pillow Pal shape and makes him look like he’s standing.) Cut two pieces of print fabric to 4 x 8 inches.
-
Fold in half lengthwise and pin. Sew along the top and open edge with a 1/2 inch seam, leaving the bottom open. Turn right side out.
-
Sew a strip of Velcro to each of the strap pieces.
Tail:
Cut a tail for your pet. This puppy tail is about 7 inches long. Pin right sides together and sew, leaving the base open for turning. Turn right side out and stuff, leaving 1/2 inch at the bottom for sewing.
Feet:
Now we’ll make the feet. Cut 4 5×5 inch squares. Cut these diagonally, creating 8 triangles. Pin one triangle to each corner of the top piece. Then pin the remaining triangles to the two back pieces, one in the upper corner and one in the lower, opposite from the side with the finished edge.
-
Sew the triangles on the diagonal to secure, using a zig-zag stitch.
Assembling Pillowcase:
Now it’s time to put it all together. Lay the top pillowcase piece face up.
-
Pin the strap pieces to the center of the long sides, one on the left and one on the right. Be certain that one strap has the Velcro face-up, and one strap has the Velcro face-down. Pin the tail to the center of one short end. Be sure the tail is pointing inward.
-
Lay one back piece face down on top of it, with the finished edge towards the center. The triangles should match up in the corners. Pin in place.
-
Lay the remaining back piece face-down on top, lining up the triangle corners. You’ll notice that this overlaps the other back piece. (This is so that we don’t have to add Velcro or tie closures.)
-
Sew all the way around with a 1/2 inch seam. Turn right side out. Hand-sew the head to the end opposite the tail. Insert pillow.
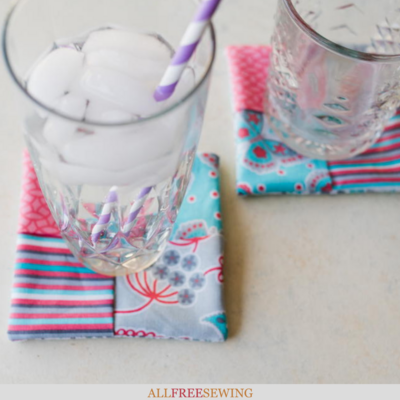
Read Next10-Minute Folded Fabric Coasters
Your Recently Viewed Projects
Thanks for your comment. Don't forget to share!
Weberme
May 03, 2016
This is so awesome. I must make one for each of my grandkids. I love that you can slip a pillow in and out of it without a lot of fuss. This video is done great so you can follow it with no problem. It all seems so easy. I like that she used plates instead of pattern so it will lay flat when cutting out head,face and feet. Anyone try this yet?
Report Inappropriate Comment
Are you sure you would like to report this comment? It will be flagged for our moderators to take action.
Thank you for taking the time to improve the content on our site.