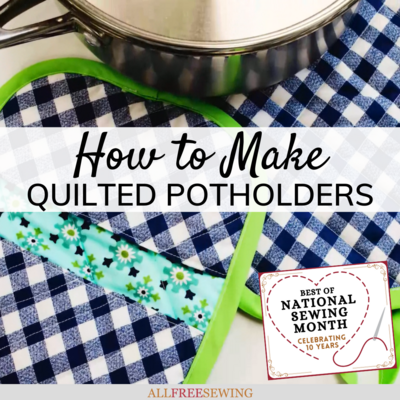
How to Make a Quilted Potholder (Video)
Making potholders is simple with our video tutorial and step-by-step instructions!

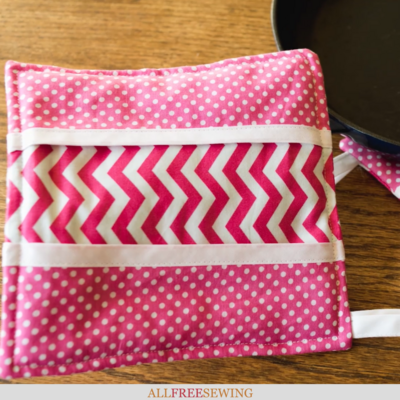
Looking for a fun addition to your kitchen? Then look no further than this fun gingham pot holder! Our video tutorial shows you How to Make a Quilted Potholder that's so easy, you'll want to make them for everyone you know.
This easy sewing project is perfect for sewists looking for a quick pattern that is actually useful. These DIY pot holders contain insulation so they can withstand heat.
Plus, the gingham pattern on this fabric is classic, cheerful, and sure to brighten up your kitchen. With pot holders this cute, you'll actually want to cook all day long. Save money on boring store-bought pot holders and work up this fun sewing pattern instead.
Don't forget to check on everything happening during National Sewing Month by checking out our hub page here.
For more sewing inspiration, sign up for our newsletter!
How to Make a Quilted Potholder Video Tutorial
Visual learners, rejoice! This video tutorial walks you through everything you need to have and do to make your own beautiful quilted potholders. Press play on the box below to watch.
Quilted Potholder Instructions
Materials List:
• 9 by 7 inch squares of fabric A
• 7 by 5 inch squares of fabric B (great scrap buster)
• Insulated batting
• Cotton batting
• Free pattern
• Rotary cutter, ruler, and mat
• Sewing essentials
• 505 spray or glue stick
• Marking pen
• Double fold bias tape
Get the downloadable PDF
- Cut two 7 by 9 inch rectangles from fabric A, one rectangle from insulated batting, and one from cotton batting.
- Using a glue stick or 505 spray, make a sandwich with fabric A on the outside.

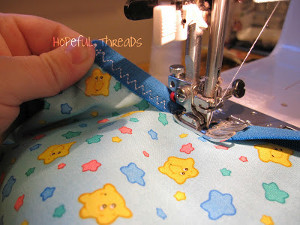
- Using a ruler and marking pen, mark lines on fabric. Topstitch together in desired pattern. Learn more about topstitching with our guide.

- Using the printed pattern, cut off corners and rough edges.

For the mitts:
- Using the paper pattern, cut two pieces of cotton batting.

- Fold fabric B.
- Place the paper pattern along the fold, and cut around the pattern. Repeat.

- With your ruler and marking pen, mark fabric lines for top stitching. Stitch fabric.
Putting it together:
- Clip the mitts to the base.

- Zig zag stitch mits into place, then zig zag stitch all around the potholder.
- Cut a 6 inch piece of bias tape. Sew a straight stitch along the edge of tape for the hanging loop.
- Sew on bias tape to finish.


Want More?
25+ Hot Pad Patterns >>>
Who are you making these potholders for?
Featured in our National Sewing Month collection!
Read NextHow to Make a Travel High Chair
Your Recently Viewed Projects
Thanks for your comment. Don't forget to share!
KLC
Oct 16, 2019
This is such a cute idea, especially for a housewarming gift. I make these all the time in different fabrics.
Weberme
May 05, 2017
I love these pot holders and they are super easy to make. I love that you can make them 2 different ways on with the pocket or just the pot holder itself. This video is very informative and very well done. These are great to make for host gifts or for any cook or even yourself. The video shows you how to give it that quilt effect too and their is a down loadable pattern.
Report Inappropriate Comment
Are you sure you would like to report this comment? It will be flagged for our moderators to take action.
Thank you for taking the time to improve the content on our site.