Comfiest Child Size Face Mask Tutorial
Learn how to make the most comfortable masks for toddlers and small children. It's easy with this tutorial and guide full of tips.

When it comes to mask-wearing for COVID-19, it is recommended that children over two have masks and wear them when the CDC recommends and the state or building mandates this.
However, many small children struggle with wearing masks because of fabric texture and thickness, shape and size fit, breathability, and elasticity issues.
I've been working to find the most comfortable masks for myself, family, friends, and children in my life and for charity and I've developed one of the comfiest child size face masks that can be sewn or bought.
I'm sharing all the details about why this combination makes for the best face masks for kids. There are also printable templates in different styles for children ages two through teen (adults, too).
For the best toddler face mask you can make, follow the tips and tutorial below and see how they like it. If you have any ideas on how it would be more comfortable, please share them in the comments.
Let's get started!
Sign Up For More Free Tutorials & Patterns >>

What Makes the Best Face Masks for Kids?
Fabric Choice
As with any face mask, you want the fabric to be 100% cotton or natural fibers that are breathable but are tightly woven. For more info, give our guide, What are the Best Fabrics for Face Masks?, a read.
Because it's touching the face, the fabric used should be as soft as possible. Quality cotton fabrics tend to be soft from the get-go but you can also soften fabrics in the wash. Just keep any allergies or skin sensitivities in mind when using detergent and fabric softener.
Mask Fit
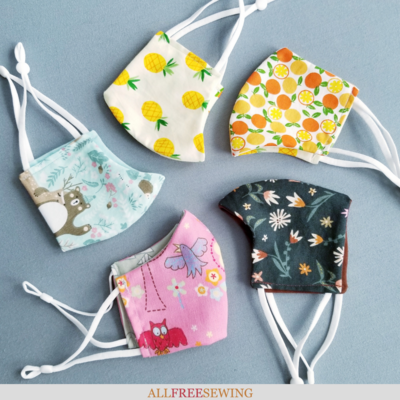
There is not one mask style that everyone loves, which is why it's a good idea to try a few out. This tutorial is using a style that most people (and kids) I personally know like the best but that might not be the case with your child. They might even prefer a 3D face mask.
It's important that the mask fully covers the mouth and the nose, as well as the sides of the face tightly enough to prevent contact with airborne viruses.
Luckily, we have several printable templates to choose from, all with child sizes. We're going to go over these a little more in the measurement section below.

Breathability
Although the mask should be multi-layered and tight, it should still be breathable. That's where high-quality cotton and fit come into play. In order to make the best mask for a kid, you need to test out different fits. Two of the three styles we have for printable templates stick out from the face, offering more breathing room.
A nose wire also helps to keep the mask in place and breathable. Nose wires are inexpensive and easy to find online. They tend to be long (about 4") slightly bent wires coated with plastic.
Nose wires can be cut to the size needed. For adults, I cut the wire about 2" and, for children, 1.5". It goes on the inner fabric layer, at the top of the mask where it lays on the nose (leaving room for the seam allowance). See the image below (left) for a visual of the nose wires. It's also part of the tutorial.
Elastic and Ear Loops
This might be the most important for comfort, especially when it comes to children. There are a lot of options for the ear loop attachments on masks. There are even ear savers to help for comfort.
The problem that develops with standard elastic is that it keeps stretching. Elastic tends to start out too tight and, with wear, gets too loose. Both options are terrible for comfort and protection. It doesn't mean you can't use elastic, but there is a better option for not much more effort or money.
When I found adjustable earloops (purchased through Amazon but this is not a sponsored or affiliate link), it was a game-changer. These soft and comfortable elastic pieces are similar to stockings in feel and stretch.
They also come with a movable plastic piece that allows you to adjust the size dramatically without having to replace the loop. Plus, they are available in different colors. Not only does this allow for maximum comfort, but it means that a mask can be fitted more easily to various face sizes and shapes. See the image below (right) for a visual of the adjustable loops. It's also part of the tutorial.

Child Size Face Mask Measurements:
When it comes to child size face mask dimensions, it really depends on the template. Our templates just need to be cut out and you're ready to sew!
If you don't want to use a template or want to know how much fabric you'll need, here is a guide:
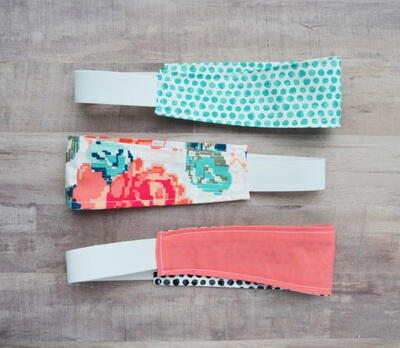
Our Style A mask template (middle in the image below) measures about 4.5" x 3.75" resulting in a mask that's about 8" x 3.5" when finished and open.
Our Style B mask template (right in the image below and the template used in this tutorial) measures about 4" x 4.5" resulting in a mask that's about 7.5" x 4" when finished and open.
Our Style C mask template (left in the image below) measures about 4" x 5.5" resulting in a mask that's about 7.5" x 3" when finished and open.
For kid's mask templates by age, the template pieces used in this tutorial are:
2-4 years: 3.75" wide x 4/.25" tall at the longest part.
3-6 years: 4" wide x 4.5" tall at the longest part.
7-12 years: 4.75" wide x 5" tall at the longest part.
Note: I needed to make masks for a two-year-old and so I cut out the smallest template from Style B and then traced a copy that was about 1/4" smaller all the way around. You can also increase the seam allowance if a smaller size is needed.


How Do You Make a Face Mask Reversible?
Double the excitement for kids with a reversible mask! It's much easier than you might think. The key is folding the side edges inside and putting the elastic or earloops inside, then sewing over (rather than folding over to the "back" of the mask).
Your thread will be visible, so it's a good idea to use a coordinating/matching thread. See Step 11 below for the visuals and instructions on exactly how to do it.
Related FAQ: Where can I find the attachment to make the string on the mask adjust to fit your face? Many people who make masks use elastic, which can be purchased at any craft store or craft retailer online and cut to fit. However, elastic will eventually stretch and the mask might not fit as tightly.
That's why I recommend adjustable earloops. As mentioned above, these earloops are soft, stretchy, but also have a plastic piece that allows you to shorten or loosen your mask for the best fit.

Note: It's important to remember that just because a mask is reversible doesn't mean you should flip it during the same wear.
Children should be prepared to wear the mask as long as needed. It's also a good idea to provide a second or third mask to get through the school day.
To prevent the spread of germs, COVID, and the flu, a mask should be worn one way, washed and dried, and then can be worn on the reverse side.

Child Size Face Mask Materials Needed:
- 100% cotton fabric (4 template-sized pieces for a two-layer mask, 6 pieces for a three-layer mask)
- Scissors (and rotary cutter/self-healing mat if desired)
- Sewing machine
- Matching or complementary thread (spool and bobbin for machine)
- Iron and ironing board
- Fabric pins or clips
- Elastic or adjustable earloop bands
- Face mask template (available in different styles and adult/child sizes) or face mask template of choice
- Filter liner - learn about filters here (optional)
- Nose wire (optional)
Note: Please read about COVID-19 and the latest guidelines from the CDC here.
How to Make the Comfiest Child Size Face Mask:
Skill Level: Easy
Approximate Time to Complete: Up to 1 hour if this is your first face mask, but can be as fast as 20-30 minutes once you understand the process!
- Print the mask template PDF (or preferred template) in the style and size desired. Cut out the mask template.
Note: Read through the tips and details above and on the template page before printing.
- Using the template of choice (this mask uses Style B from the templates), cut out two pieces of fabric for the front side of the mask. Cut two more pieces of fabric for the inside of the mask. The inside of the mask can be decorative or solid depending on whether or not you want a reversible mask.
If you would like the mask to have three layers, cut another two pieces (this set will not show).
Note: If the print/pattern is directional or has lines, make sure you are placing the template at the correct angle or right-side-up.


- Place two cut fabric mask pieces right sides together and pin or clip to hold. Sew along the curved edge with a 1/4" to 3/8" seam allowance. Lock the stitches at the start and end.

- Cut excess thread, trim as needed, and clip the curves along the sewn edge. Be careful not to cut the seams. Repeat for all sewn layers.
- Open the sewn mask piece and press the seams on the inside to one side for all pieces. If needed, iron the mask pieces to remove any wrinkles.
- Add a filter pocket and nose wire if desired (both are optional but help improve mask protection).
Note: I add my nose wire to the inside/back layer of the mask. If you are sewing a reversible mask, the nose wire stitching will be visible on one side of the mask. Choose a coordinating thread color that will be the least visible. You can either use your machine or hand stitch the nose wire into the fabric.


- Put the sewn mask pieces right sides together and pin or clip to secure, making sure that the middle seams are aligned. Sew along the top and bottom to attach (again with a 1/4" to 3/8" seam allowance). Lock stitches at the start and end.


- Cut excess thread, fabric, and clip curves along the sewn edges. Again, do not cut through the seams.
- Turn out the DIY child face mask so that the right sides are out. Be sure to push out along the sewn edges to push the fabric out all the way. You can do this with your fingers or with a pressing tool.
- Press both sides of the mask to flatten seams and remove wrinkles. Pay extra attention to the edges.
- To make the mask reversible (optional), push in the raw edges on both sides about 3/8"- to 1/2". Press if needed to keep in place.
- Cut elastic if needed (should be about 5" for children's sized masks) or grab your earloops in the color desired. Carefully place the elastic/earloops inside the mask, leaving at least 1/2" inside the mask to be sewn and attached. Pin or clip if desired to hold while sewing.
- Sew on elastic/earloops. Lock stitches at the beginning and end where the earloop is located for extra strength.
Note: This thread will be visible, so be sure it matches your fabric if that's something you're concerned about. It helps add a stylish and professional look when the thread matches/coordinates.

- Clip the excess thread. You're done!


More DIY Child Masks in Different Styles:
The child size masks below are shown in Style C.

The child size masks below are shown in Style A.

Want More?
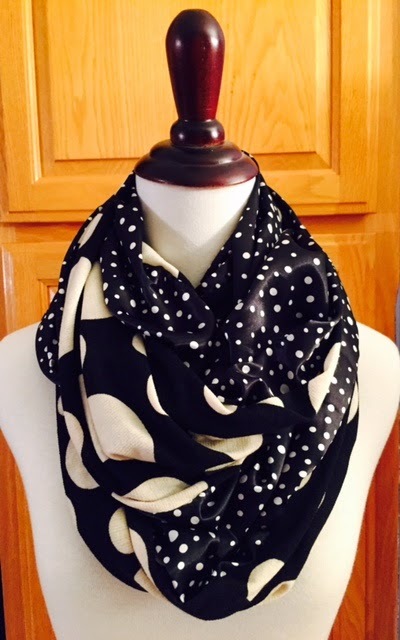
Read Next15 Minute Infinity Scarf Pattern