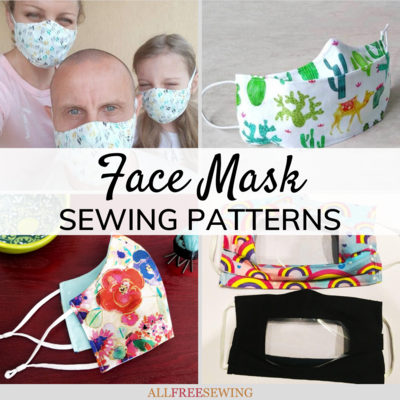
Fab Floral Face Mask Tutorial
For the most stylish face masks, use floral fabrics! This tutorial shows you how.

Nothing brightens my mood more than vibrant flowers. As a sewist, I am especially excited to see flower print fabric because that means I can use it for my next project. That's exactly what I did with this Fab Floral Face Mask!
This fabric face mask tutorial uses the most beautiful floral print fabric that's perfect for spring and summer. Or to cheer you up during the colder months. This is one of the most stylish face masks I've made. In fact, I kept going and made several more floral masks (which are shown at the bottom of the page).
When you design your own face mask, you can customize it any way you want. No two are alike because no matter what, the placement of the print is different. That's one of the main reasons why I love working with floral prints.
Along with this full written and picture tutorial, I am adding tips on choosing fabric, how to make your mask reversible, and providing my tips and helpful notes along the way. Also, did I mention that there are free printable templates? That's right, we have three mask styles to choose from and print so that you can make your ideal mask easily.
This floral mask is a great option for holidays, too! Because they are so beautiful and elegant, a DIY mask like this will add a lovely touch to your Easter, wedding, or church outfits, along with any other holidays or events that arise. Impress your socially distanced group with your fab accessory.
Sign Up For More Free Tutorials & Patterns >>
COVID Update: The CDC released new safety guidelines in February 2021 about the importance of double masking to prevent the spread of SARS-CoV-2. Two multi-layered masks are now recommended. Read their report here.
Let's get started!

How to Choose Floral Fabrics for DIY Masks
If you've been to a fabric store lately, you know that florals are in and there are a lot of options. Add the internet and you have a never-ending supply of gorgeous floral prints to choose from. To help you narrow it down, I have a few tips.
As with any face mask, you want the fabric to be 100% cotton or natural fibers that are breathable but are tightly woven. For more info, give our guide, What are the Best Fabrics for Face Masks?, a read.
Another thing you want to look for is whether or not it has a directional print or how large or small the designs are. Will they work for masks? This is my latest haul of floral fabrics:

A few Art Gallery Fabrics pieces, Mustard Woodland Cotton Apparel Fabric (shown as a finished mask on this page), Green Multi Trendy Floral Apparel Fabric, and a few others I've found during my crafting my travels.
Most will work well for masks but there are a few that won't or will need careful planning. The second over in the top left has a large flower that would take up nearly the whole template piece. If that's the look I want, I can go for it but I prefer to have a little more going on. It's also directional, so I'd have to make sure that I cut it out correctly with the flower right-side-up.
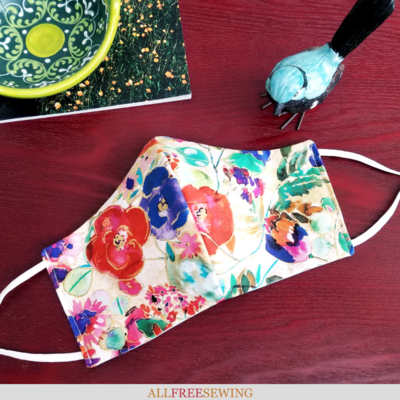
In the end, I went with this vibrant watercolor-style print for my mask, along with a soft pastel blue for the other side (both shown below). The floral fabric is Brother Sister Design Studio, Multi-Color Floral Fat Quarter. Note: None of the mentioned fabric companies and designs are sponsored or paid.
If you've looked at my finished mask, you might notice that the red flower on the right side gets cut off slightly. I did try to have the red cross to the other side of the seam but did not give it enough of a seam allowance.
After sewing, I realized that it did not work as planned. I still like the look of it, but would've liked it better without the sharp break. Let my mistake help you plan better if you have fabric that's similar.

How to Make a Mask Reversible
Double your floral options with a reversible mask! It's much easier than you might think. The key is folding the side edges inside and putting the elastic or earloops inside, then sewing over (rather than folding over to the "back" of the mask). Your thread will be visible, so it's a good idea to use a coordinating/matching thread. See Step 11 below for the visuals and instructions on exactly how to do it.
Related FAQ: Where can I find the attachment to make the string on the mask adjust to fit your face? Many people who make masks use elastic, which can be purchased at any craft store or craft retailer online and cut to fit. However, elastic will eventually stretch and the mask might not fit as tightly.
That's why I recommend adjustable earloops, which I purchased through Amazon. These earloops are soft, stretchy, but also have a plastic piece that allows you to shorten or loosen your mask for the best fit.

Note: It's important to remember that just because a mask is reversible doesn't mean you should flip it during the same wear. To prevent the spread of germs, COVID, and the flu, a mask should be worn one way, washed and dried, and then can be worn on the reverse side.
Flower Face Mask Materials Needed:
- 100% cotton floral fabric (4 template-sized pieces for a two-layer mask, 6 pieces for a three-layer mask)
- Scissors (and rotary cutter/self-healing mat if desired)
- Sewing machine
- Matching or complementary thread (spool and bobbin for machine)
- Iron and ironing board
- Fabric pins or clips
- Elastic or adjustable earloop bands
- Face mask template (available in different styles and adult/child sizes) or face mask template of choice
- Filter liner - learn about filters here (optional)
- Nose wire (optional)
How to Make a Fab Floral Face Mask:
Skill Level: Easy
Approximate Time to Complete: Up to 1 hour if this is your first face mask, but can be as fast as 20 minutes!
- Print the mask template PDF (or preferred template) in the style and size desired. Cut out the mask template.
Note: Read through the tips and details on the template page before printing.

- Using the template of choice (this mask uses Style B from the templates), cut out two pieces of floral fabric for the front side of the mask. Cut two more pieces of fabric for the other side of the mask (this can be floral or plain depending on whether or not you want a reversible mask or floral print on both sides).
If you would like the mask to have three layers, cut another two pieces (this set of fabric will not show).
Note: If the print/pattern is directional or has lines, make sure you are placing the template at the correct angle.
- Place two cut fabric mask pieces right sides together and pin or clip. Sew along the curved edge with a 1/4" to 3/8" seam allowance. Lock the stitches at the start and end.

- Cut excess thread, trim as needed, and clip the curves along the sewn edge. Be careful not to cut the seams. Repeat for all pairs.

- Open the sewn mask piece and press the seams on the inside to one side for all pieces. If needed, iron the mask pieces to remove any wrinkles.

- Add a filter pocket and nose wire if desired (both are optional but help improve mask protection).
Tip: I add my nose wire to the inside/back layer of the mask. If you are sewing a reversible mask, the nose wire stitching will be visible on one side of the mask. Choose a coordinating color that will be least visible. You can either use your machine or hand stitch the nose wire into the fabric.


- Put the sewn mask pieces right sides together and pin or clip to secure, making sure that the middle seams are aligned. Sew along the top and bottom to attach (again with a 1/4" to 3/8" seam allowance). Lock stitches at the start and end.

- Cut excess thread, fabric, and clip curves along the sewn edges. Again, do not cut through the seams.

- Turn out the DIY floral mask so that the right sides are out. Be sure to push out along the sewn edges to push the fabric out all the way. You can do this with your fingers or with a pressing tool.

- Press both sides of the mask to flatten seams and remove wrinkles. Pay extra attention to the edges.

- To make the mask reversible (optional), push in the raw edges on both sides about 3/8- to 1/2-inch. Press if needed to keep in place.

- Cut elastic if needed (should be about 7" for adults and 5" for children) or grab your earloops. Carefully place the elastic/earloops inside the mask, leaving at least 1/2" inside the mask to be sewn and attached. Pin or clip if desired to hold while sewing.
- Sew on elastic/earloops. Lock stitches at the beginning and end where the earloop is located for extra strength.
Note: This thread will be visible, so be sure it matches your fabric if that's something you're concerned about. It helps add a stylish and professional look when the thread matches.

- Clip the excess thread. You're done!


More DIY Floral Mask Ideas:
I couldn't stop myself and kept going. Here are a few more floral masks to give you some inspiration for your own!


Want More?
80+ Free Spring Sewing Patterns >>>
What is your favorite flower?
Let us know in the comment section!
Read NextBifold DIY Wallet
Your Recently Viewed Projects

Thanks for your comment. Don't forget to share!
KLC
Apr 19, 2021
This mask is really pretty and I like to wear it when I want to look "nice" while out and about or at a socially distanced event.
Report Inappropriate Comment
Are you sure you would like to report this comment? It will be flagged for our moderators to take action.
Thank you for taking the time to improve the content on our site.