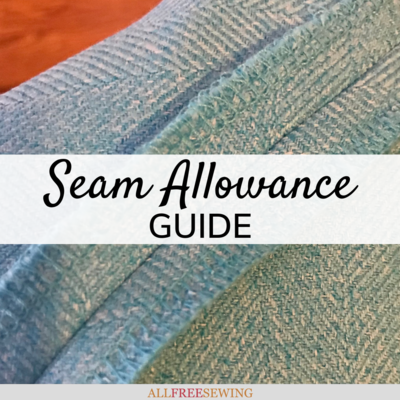
Seam Allowance Guide
Need to figure out seam allowances? This hand and sewing machine seam allowance guide will help you understand how much space to leave for your sewing projects.

When sewing, it's very important to accurately measure seam allowances. This helps maintain the correct sizing and shape of the pattern, as well as creating consistency across projects.
Most pre-made sewing patterns will have the seam allowances already marked, but it's still helpful to know the standards for various kinds of seams (especially if you plan to make your own patterns or when you find one that doesn't include the allowance marks).
With this seam allowance guide, let's look at a few considerations when measuring, marking, and sewing seam allowances, then discuss a few tools to simplify the process!
First, we're going over what a seam allowance is. Then it's on to standard and common seam allowances. After that, you'll learn about serged edges and seams and unique situations.
Lastly, we'll go over sewing seam allowances. Once you're finished, you'll be much better off before you start your next project.
Sign Up For More Free Patterns
What is a Seam Allowance?
The seam allowance sewing definition is the part of the fabric or material added to the known dimensions of a sewing pattern outside the seam.
Basically, it's a certain amount of fabric after the stitched portion. The excess fabric that can be left as is or trimmed.
What is a seam allowance used for? The main reason to have a seam allowance is that it will, as mentioned in the intro of this page, help to assure correct sizing and shape. It will also keep the stitches from being exposed or coming out. You will learn more about this by reading the full guide, so keep reading!

Standard Seam Allowances
So, how much seam allowance is usual? The short answer is that it depends on the sewing project. A 1/4" is the minimum most sewists are willing to go for seam allowance because anything smaller and you'll risk sewing over the edge. This is particularly the case when sewing with a machine.
If you're more familiar with cm, you may wonder how much is 1 cm in sewing inches? It's about 3/8" but keep in mind that it's not exact. Below, there are more standard measurements in both imperial and metric.
A seam allowance is the amount of space from the cut (raw) edge of the material to the inward line which will be sewn to connect panels and construct the garment or other item.
These measurements are important because they can impact the fit and tailoring of most sewing projects.
While the range of seam allowances depends on the kind of pattern used (and even what country the pattern was made in!), there are a few "standard" measurements. Commonly used seam allowances include:
5/8" (inch), approximately 1.5 cm
1/2" (inch), approximately 1.3 cm
3/8" (inch), approximately 1 cm
1/4" (inch), approximately 0.6 cm
The 5/8" seam allowance is the most commonly used in the USA, while 3/8" tends to be used in other parts of the world.
Because outside of the USA, you will find the seam allowance in cm, we shared both the inches and centimeter measurements.
Seam Allowance Chart
| Standard Seam Allowances | |
|---|---|
| Inches | Centimeters |
| 5/8 in | Approx. 1.5 cm |
| 1/2 in | Approx. 1.3 cm |
| 3/8 in | Approx. 1 cm |
| 1/4 in | Approx. 0.6 cm |
Serged Edges and Seam Allowances
Many garments will have raw edges that have been finished with a serging (or "overlocking") machine. Serging keeps the fabric from fraying and provides a nice, polished look. If you want to use this technique be sure to carefully overlock and avoid trimming off too much fabric.
Because the serged edge is cut off and finished with a stitched border, going in too far can throw off the seam allowances. Likewise, not going far enough in when overlocking creates a loose thread border and an uneven seam.
Instead, carefully follow the raw edge of the material you’ve cut out from the pattern while operating the machine at a slow speed.
Extra tip: Trim any dangling threads at the ends of your overlocking and sewing so they don’t get caught in the seam allowances.
Exceptions and Unique Situations for a Seam Allowance Guide
Not every garment or other sewing project needs exact seam allowances. If it's a freestyle type of piece or a non-tailored garment the seam measurements might not have to be as even or standard. This doesn't mean they should vary widely, but sometimes this aspect isn't as crucial to the look and fit of the item.
On the other hand, some projects have seam allowances with excess fabric purposely added. For instance, tailored trousers with a traditional waistband will often have a triangular-shaped seam in the seat that isn't visible on the outside. It tapers downwards and is widest at the waist. This allows this area to be let out in the future if the garment is too tight.
Tools and Techniques for Measuring Seam Allowances
Basic measuring tapes and rulers are great for using when checking and marking seam allowances. There are also specialty tools for measuring seam allowances. These little multi-sided rulers are occasionally given away as promotional items by sewing supply companies.

Extra tip: For the most accurate sewing of seam allowances, compare your rulers to be sure the measurements printed on them are correct. Sometimes the spacing is inaccurate and this can throw off very tailored projects.

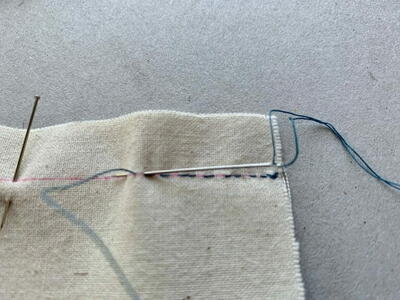
Marking Seam Allowances
Some sewists prefer to mark their seam allowances with pens or chalk, while others make a small snip in the fabric. When making a small cut to mark a seam allowance, be sure to cut into the fabric only a tiny bit or it can go into your seam line. Using a quality pair of fabric scissors will provide the best results.
You may prefer to mark the seam allowances with fabric chalk or a washable fabric marker. Be sure to mark both sides of the fabric so it’s easier to line them up before sewing.
Also, test the pen or chalk on a swatch of the fabric to make sure it doesn't transfer or stain. Most of these products wash out with mild detergent or can even be wiped off with a damp cloth.
Sewing Seam Allowances
One of the most helpful things when machine sewing is that there is often a seam allowance guide on sewing machines. Most home sewing machines will have seam allowance lines marked on the plate to the right of the presser foot.
A 3/8" allowance is usually the first line, and 5/8" the second, but measure this with a ruler because machines can vary!
Another way to keep track of your seam allowances when sewing is by using the machine’s presser edge foot as a guide. Most all-purpose machine presser feet will be approximately 5/8" (inch) wide, and the position of the needle can be adjusted to accommodate most seam allowance measurements.
Always double-check the accuracy of your measurement and the needle placement with a ruler or similar tool before sewing.

Another option when machine sewing is to use a magnetic seam allowance tool. This can really help to keep an accurate line for seams. It simply grips onto the plate of the machine and stays there to guide the fabric (which sits up against it) while you sew.

Extra tip: After sewing seams together, iron the seam allowances: initially flat together from each “wrong” side, then open. Pressing will make the seam allowance lay flat and the garment fit more smoothly. Test your iron in an inconspicuous place if using a delicate fabric.

Want More?
Types of Sewing Needles >>>
What are your favorite ways to measure seam allowances?
Let us know!
Read NextHow to Sew a Button on Pants