Handmade Handbag Hacks
Get purse strap hacks, handmade bag tips, and more with this guide on purses.

When it comes to sewing purses and bags, there are a lot of unique methods and tutorials that can help or hurt your end result. Since bag sewing patterns are so popular with creators of all skill levels, a page full of tips will be a welcome read for most.
Rochelle from eSheep Designs is going to go over some of her handbag hacks and tips. This guide originally appeared on her site as Handy Hacks for Handmade Handbags.
This post is a bit of a "how to" about taking a basic purse pattern and customizing it to your needs. Note that I assume the reader has bag making experience because if you're a newbie, you should probably make a bag as described.
And since I have a peculiar fondness for alliteration, the title of this post refers to these as "hacks" of the handy sort. Warning... this is going to be a long one!
Fabric Hacks for Bag Making
If you don't have full yardage to cut from, what can you do?
Well, if you have two fat quarters that go well together, you can do split each in half and very easily have sufficient fabric to cover both sides of a bag. Here's what the body panel from my recent bag looked like after I sewed it up out of two different halves of fabric.

What's the best way to do this? If the pattern template for the main body piece is designed to be cut on the fold (as it typically is to maintain symmetry), pin the template on top of the folded edge of the fabric with an extra 1/4" of the folded fabric visible underneath.

After cutting around the template as usual, cut the fabric piece in half. That extra 1/4" along the original fold line will be the seam allowance when you sew together the two different pieces of fabric.
By extraordinarily happy circumstance, the print on my fabrics actually merged together very well. (I did as much fussy cutting as I could, given the limitations of a fat quarter.)
To create an even more interesting look, slice each fat quarter along the diagonal, sew up the opposing fabrics, and then cut your body panels. This would be particularly effective when combining a print with a solid.
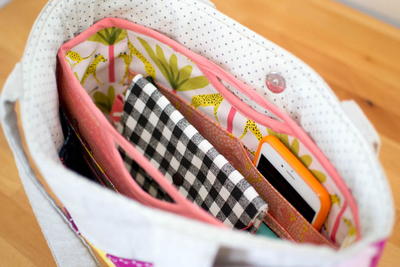
DIY Bag Gusset Pocket Hack
A slip pocket built into the side gusset of a bag is extremely handy and relatively easy to do. (I find those pockets convenient for receipts, sunglasses, keys, and even my cell phone — 'cause my cell phone is quite small.) If your bag pattern is designed with a gusset, give this a try.
The most complicated part of the process is to figure out where the bottom of the pocket should end up. It obviously needs to be above where the gusset starts to curve into the bottom of the bag.
(Unlike the picture below, your bag will not be sewn together when you make this determination, so take the gusset piece and use pins to attach it temporarily to the body panels so that you can estimate where the bottom edge should be.)

Once you determine the placement for the bottom of the pocket, mark that location on both the fabric and the paper template.
Measure up at least 5.5"; that will result in a 5" deep pocket, which is pretty much a minimum size for usability. That said, base your decision on how narrow the top might be — don't make a pocket you can't reach into.

Use the gusset template along that 5.5" section as a guide to cut two pieces of fabric (one exterior, one lining for each pocket; so four in total if you want pockets at both ends).
Put the pieces of fabric right sides together and sew along both top and bottom edges with a 1/4" seam allowance. Turn right side out and press well. Topstitch along the top edge if desired.
Pin the resulting pocket piece (right side up) to the gusset exterior (right side up), with the bottom of the pocket lined up at the location you marked previously. Sew across the bottom to attach the pocket to the gusset.
Baste the sides of the pocket to the sides of the gusset, inside whatever the seam allowance happens to be, e.g., baste at 1/4" if the seam allowance is 3/8".

That's all there is to it — your slip pockets will "magically" appear when the gusset exterior is attached to the outside body panels of your bag.
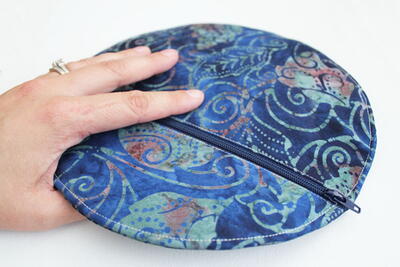
Tips for Adding Zippered Pockets
No, this isn't a hack and I'm not going to discuss how to add a zippered pocket, since anyone who has made a bag will have put in at least one of these. (And I'm talking about the simplest installation, where the zipper tape remains visible on the inside of the pocket.)
But I'd like to extol the virtues of adding more zippered pockets since they're extremely versatile and have the added benefit of keeping stuff safe.
The thing is, once you know how to sew up one of these, you can make them in any size and add them anywhere — and orient them in any direction — to make them fit the bag and/or to add visual interest. See my Make It Yours bag below.
.")
The only thing I'll mention on this subject is to recommend cutting a single piece of fabric for the pocket, to the desired size x 2. (That is, for an 8" wide pocket that's 6" deep, cut a piece of fabric that's 8" wide by 12" high, adding seam allowance if you want.)
The zipper is installed on the top half of this fabric, then the bottom half is folded up and sewn around on the remaining three edges.
Much easier than trying to match up two separate pieces of fabric because — and tell me if I'm wrong about this — whenever you sew a zipper onto a piece of fabric, it ends up maddeningly smaller than the other piece of fabric cut to the same original size!
Some people are terrified by the idea of installing a zippered pocket. Generally speaking, I find them a breeze. The reason is likely that I have done so many of them. My advice? Get rid of your fear by practicing more.
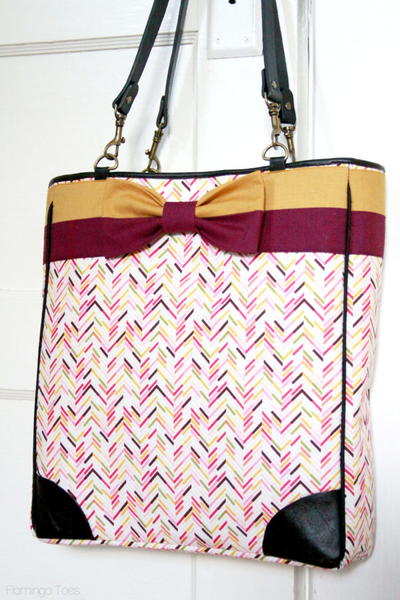
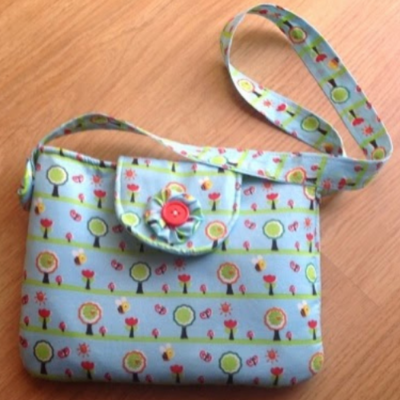
DIY Purse Strap Hacks
If you've ever thought that a strap is just a strap, you're quite mistaken. Length, width, single/double, choice of fabric or hardware... all of that affects how the strap enhances — or detracts from — the final look of a bag.
(I recently saw a small bag made with a standard width strap and it looked really odd; a skinny strap would have done it justice.)
From reusing belts to embellishing with ribbon or bias tape, I've always tried to be creative with my bag and purse straps. I think a handmade bag stands out even more when you pay attention to how it "hangs".

If the bag pattern calls for a basic embedded continuous strap, the easiest way to jazz it up is to go the "strap anchor, connector, and strap" route. Because the sewing process doesn't really change, it's a relatively simple hack to carry out.
The most common method of making a strap is what I call the "no turn" strap, starting with a strip of fabric that is essentially four times wider than the intended strap width.
(It is folded in half, opened up so that the two outer raw edges can be pressed in towards that middle crease, and then the whole thing is folded back along the original fold and stitched up on both sides.)
If you're working with quilting cottons, the fabric should be stabilized with either a medium weight interfacing over half its width or, better yet, some fusible fleece over one-quarter of its width.
In my case, the strap fabric was about 3.75" wide; after folding the entire length in half, I fused a 1" wide strip of fusible fleece down the entire length right beside the middle crease.
Once the strap is made — and particularly if it's a solid color — you can add ribbon, rickrack, or lace to the outside, or embellish with one of your machine's decorative stitches. Instant pizzazz!

Of course, a strap anchor is made in the same way as the main strap; it's just shorter and you don't have to finish off the ends.
A typical length might be 4" to 5". Fold it in half, thread one end through your connector, and sew across it as close as you can to trap the connector in place. Attach strap anchors to the bag body by following the pattern's original instructions for installing the strap.
As a bonus, there will also be an opening between the two layers of the strap anchor so that you can attach extra bling like this purse hanger (or a split ring from which to hang even more stuff).

Something to keep in mind when you replace a single strap with the anchor/connector/strap combo: the overall "handle drop" measurement will increase. It's not a huge problem, however, since attaching the strap is the last thing that you'll do and you can always try it on for size before securing the strap to the connector.
For my FrankenPurse, the original strap was too short for my liking, judging from the pattern photos. (It seemed like it would be tucked under the arm in such a way that opening it would be a hassle.)
I didn't do any measuring but figured that my modifications would result in a handle drop that better suited me. It ended up being perfect.
Purse Hanging Loop Hack
A sunglasses loop was something that I added to one of my very first purses, as a simple solution to a common problem. How do you keep your sunglasses handy, yet out of the way and more or less protected from the other contents of your bag?

Yes, I've made my share of glasses cases, but I don't use any of them. At the risk of repeating myself, I'm all about efficiency. Having to go into my bag, retrieve and open up a case to get at my sunglasses is simply not my preference.
With this bag, when my glasses need to be really handy, they can be stored in one of the outside gusset pockets.
This easy to add hack — essentially a teeny tiny "no turn" strap embedded into a seam (or two) — is multi-purpose. At the opposite end of the bag, I have my shopping list and coupon holder attached to another loop.

If your bag has a gusset, create this loop by putting each end into its own seam (i.e., one end between the front panel/gusset and then the other end between the back panel/gusset). If the body of your bag just has one side seam joining the front and back panels, put both ends into the seam. Just remember to choose a location fairly high up on the side of the lining.
For even more functionality, thread a lobster clasp onto the loop before you sew it in. Then you can clip your keys or other essentials like a mini flashlight for quick access.
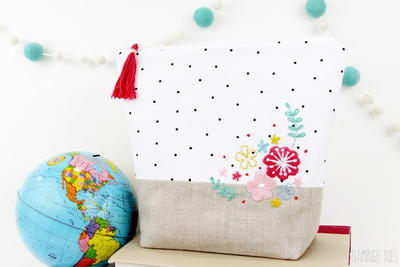
Pen Loop Patch Pocket Hack
The hanging loop can also be used to keep a pen handy, but another way to add an actual pen loop is with a small piece of elastic. I like to add this feature to a large patch pocket, because who doesn't need more pockets?

Not only that, patch pockets are the easiest of all pockets to make. (Take two same-sized pieces of fabric, place them right sides together, sew around the edges leaving a turning gap, press open the seams, turn and sew onto the desired location.)
To add a pen loop, all you need is a small piece of elastic (no more than 2" long). Ensure that the turning gap of your patch pocket is located near the top of the left or right side.

Pin the pocket assembly to where you want it on your bag. Fold the elastic in half and slip the ends into the turning gap. Sew around the pocket on the three sides, securing the elastic as you do so.
I know that designers usually instruct you to sew a division in a patch pocket to accommodate a pen. With this hack, you can use the full capacity of the pocket for other things.
Wow — I think I'm finally done. Hope you've enjoyed this lengthy discussion on how to hack your handbag!
Find more of Rochelle's handbag and additional sewing patterns, tutorials, and tips on her site, eSheep Designs.
Want More?
150+ DIY Bags to Sew >>>
What is your favorite purse style?
Let us know in the comment section.
Read NextLittle Girl Purse with Flap