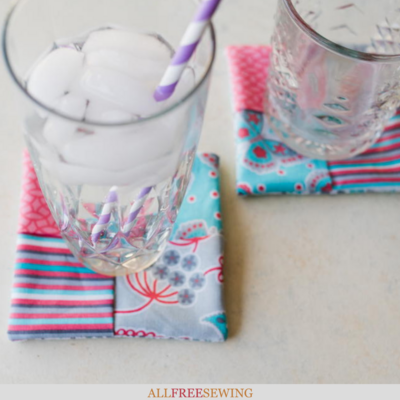
10-Minute Folded Fabric Coasters
Learn how to make fabric coasters that stand out from the crowd. The unique folding technique makes these super fast to make, too!

If you want a truly quick and easy sewing project that is still super adorable try out these 10-Minute Folded Fabric Coasters.
That's right, these DIY fabric coasters can be made super quickly. This is the perfect sewing project that you can make as a gift for a hostess gift or a holiday party gift.
You can make tons of these folded fabric coasters in just one hour that are great for using anywhere in your house. Not only can you use up your fabric scraps for these coasters but you can add extra absorbent cotton batting to make these extra helpful.
Plus, have charm packs you've been wanting to use? These folded fabric coasters are the perfect sewing project for you to use up some of your different pieces of leftover fabric, especially charm pack pieces.
Sign Up For More Free Patterns >>>
Skill Level: Easy
Project Type: Make a Project
Time to Complete: Under an hour
Sewn By: Machine
Folded Fabric Coasters Video Tutorial
Videos are great for visual learners! Learn how to make these fabric coasters by seeing Mary Beth do it. It's particularly helpful to see how she folds the fabric rectangles. Press play on the box right below. Then scroll down to read through the written tutorial.
10-Minute Folded Fabric Coasters
Materials Needed
- Five 5" squares of fabric in coordinating colors – charm squares work perfectly
- 4" square quilt batting
- Sewing machine
- Hand needle and thread
- Iron and ironing board
- Cotton batting (optional)
How to Make Fabric Coasters:
- Choose five squares that complement each other. Put one of your squares aside because that will be the backing of your coaster.

- Fold your other four squares in half with wrong sides facing each other, and press them with your iron.
Note: Alternatively, you can pin the fabric pieces in half.


- Lay one of your folded pieces of fabric down.
Lay down another one at a 90-degree angle over one side of the first.
Lay the next one on top going the same direction as your first one over the bottom half of the second.
For the last one, lay it over the most recent piece of fabric at a 90-degree angle but underneath the first fabric you laid down.
Note: Take a look at the images below to help visualize how you will lay down your pieces. Make sure the pieces are tight and the folds meet at the center.


- Place your backing fabric right side down over the square you just created.
Pin it to hold.
Sew all the way around the four sides but leave an opening (approximately 2-1/2 inches) in the middle of the fourth side.
Clip your corners diagonally, turn it right side out, and give it a quick press to finish.
Notes: When all the fabric pieces are folded, the "right sides" are facing some of the same ways, which can look incorrect but isn't.
Even though sewists usually sew with the edge on the right side of the sewing foot, this project is so small that you may want to sew with the seam edge on the left.


- Optional: Place some cotton batting in the opening and wiggle it in so that the corners line up. This can add an extra layer of protection and absorbency.

- Hand whip stitch your opening closed and tack stitch the middle to close it up.
Note: You can also use a tack stitch to secure the center fold of your coaster if desired. Likewise, you can add any decorative stitches to the tops.


Want More?
How to Sew a Rolled Hem >>
Sick of seeing the edges of your sewn projects fray?
Learn how to sew baby hems to nip this problem in the bud!
Read Next10-Minute Folded Fabric Coasters
Your Recently Viewed Projects
Thanks for your comment. Don't forget to share!
Weberme
Jul 25, 2017
Oh WOW I love these adorable coasters that resemble quilting and love that they are so easy to make. This is a great way to use up those fabric stashes or even fat quarters. You can make them to match your decor or a friends. The coasters will make super gifts for anyone or make some to give away as hostess gifts or prizes. Great way to teach someone to sew too. It also has a video too. Can not wait to try it.
Sandi C
Jul 07, 2017
I've always wondered how these were made! I can't believe it's so easy. I was given a little kit for making one and I gave it away without opening it because I thought it was going to be difficult. I guess that was silly now that I see how simple the instructions are! I'll be pulling out scraps this weekend to try this out. Thanks for a great tutorial.
Report Inappropriate Comment
Are you sure you would like to report this comment? It will be flagged for our moderators to take action.
Thank you for taking the time to improve the content on our site.