How to Sew a French Seam
Learn how to sew a French seam step by step with this tutorial.

One of the most popular finishing techniques, a French seam, adds an elegance that's unlike any other.
When is it best to use a French seam? It looks fantastic on anything from garments to home furnishing projects.
It is an ideal seam for sheer or lightweight fabrics like chiffons and silks, and is often seen on lingerie and designer dresses. Learn more about French seams and when and when not to use them below.
For your next sewing project that uses such material, consider creating French seams!
The following is a guide to understanding and implementing this sewing technique, including recommended supplies and repair tips. Let's learn how to sew a French seam so that you can up your sewing game today.
Sign Up For More Free Patterns >>>
What is a French Seam?
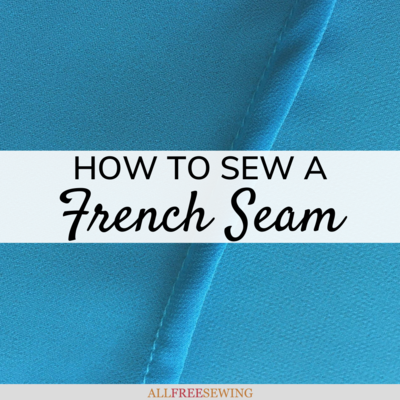
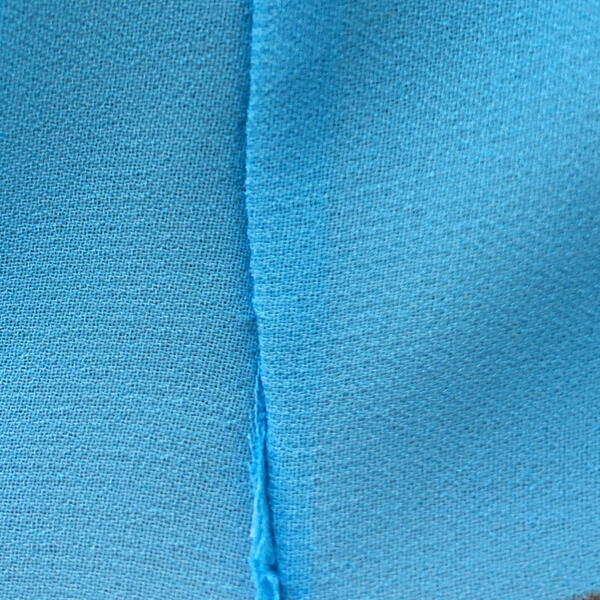
So what exactly is a French seam, and how is it different than other kinds of joining and finishing seams? It is an enclosed seam, meaning the raw edge is not facing outward.
Unlike an overlocking machine stitch, a French seam does not cut off the edge of the fabric. It also is not a simple seam made with one line of stitching. Instead, it consists of two lines of sewing machine stitching, with only the second line clearly visible on the outside.
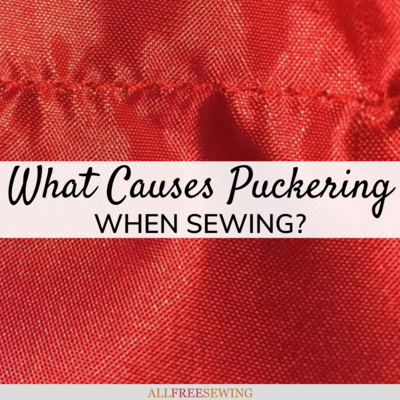
This creates a small pocket for the raw or pinking-sheared edge, and a smooth finish on the visible side. Because it requires very even stitching to prevent puckering, French seams are best created on a sewing machine (rather than by hand). A thread color that matches the fabric is recommended so it blends in nicely.
When to Use a French Seam
Lightweight and see-through materials are ideal for creating French seams. They tend to fray and show “runs” more easily than other fabrics because of their delicate nature.
This joining and finishing style helps prevent that from happening over time, as well as looking elegant and professional. French seams work well on fabrics such as organza, silk, and chiffon (to name just a few). For the home, sheer curtains are often finished with French seams.
When Not to Use a French Seam
French seams are not recommended on very thick fabrics like faux fur and heavyweight wool. The thickness of the material would make the French seam very bulky and lumpy, defeating the purpose of using it in the first place.
Even with trimming down the cut ends of the seam before the final stitch line, the bulkiness would make this finishing style very difficult on certain materials. If you are curious about using a French seam on a particular fabric, try it on a sample swatch of the cloth before you decide if it’s possible or not.
Recommended Supplies and Tools
When creating French seams there are a few items that are (usually) necessary. An iron, pins, a ruler (or seam allowance tool), and fabric scissors are all important to have on hand.
The iron will allow you to press the seams and get out any wrinkles in the fabric. Pins are useful for connecting your materials before stitching, especially when working with slippery cloth. A ruler will allow you to get accurate measurements for your seam allowance, and quality fabric shears provide a clean cut before the seam is completed.
Extra tip: When ironing delicate fabrics always do a tester swatch to make sure the iron won’t melt or ruin the fabric. Similarly, pin in an inconspicuous area within the seam so the cloth won’t get tiny holes that are visible.

How to Sew a French Seam:
Here are the steps of sewing a French seam that can be used for most sheer fabrics. The measurements and other specifics can vary depending on your material and the pattern being used, so adjust it to fit the needs of your particular project. It may be helpful to do a trial swatch to test your seam allowances before sewing up all of your final pieces.
- Start with the fabric pattern pieces that you will be joining in the French seam. Working on a clean, flat surface is recommended. Place the pieces as they will be attached with the WRONG (reverse or underside of the material) sides together and pin to hold in place.

- The first line of regular stitching for the French seam can now be made. The exact measurements might vary depending on your pattern but, generally, the machine stitching should be slightly less than 1/2 of the width of your finished seam allowance amount. It tends to be between 1/4" - 1/2" (inches) inward or so from the outer cut edges of the fabric. Sew this line of stitching and trim off the excess threads on the ends.
Extra tip: You can also leave more space to work with by adding extra onto your seam allowances before cutting out your fabric. Just be sure to add a notch or marking where the finished seam line should end.

 for how to sew French seams.")
- Carefully trim the excess material on the raw edges so that it’s about 1/2 as thick as it was after the first stitch line. Don’t cut too close to the stitches or the fabric can fray. This step will keep the seam secure while eliminating extra bulk.

 for how to sew French seams.")
- Now that you’ve made the first line of stitching, gently press the whole seam (keeping it together) with your iron on both the front and back. Press the whole seam over to one side so it lays flat.

 for how to sew French seams.")
- Next, fold your fabric over so the RIGHT (top) sides of the material are facing each other and the sewn seam is on the very end of the fold. Press the seam again with your iron from the top side so that it is smooth and flat.

- Almost done! The second line of stitching can now be sewn with the machine. If the material is slippery you may want to use a few pins. Measure in from the folded over and pressed seam edge and go inwards the other 1/2 of your seam allowance measurement.
The second line should be exactly along the seam allowance measurement line on your pattern- so the same place you’d sew if making a simple seam. This will keep the measurements accurate for your garment or home furnishing.
Be sure the line is sewn completely off of the raw edges that you are encasing, otherwise the edges can stick out and be visible on the outside of the finished seam.

- Clean up any loose threads and then from the inside use your iron to press the seam to one side. Now you have a beautiful French seam!


Repairing French Seams
If you have a garment or other item with a French seam that has ripped, repairing it can be a little tricky because of the two rows of stitching.
If possible, use a seam ripper or tiny scissors to remove excess loose threads which being careful not to tear the fabric. Then fold back the material so you can reach the inner line of stitching, and pin and sew this part carefully.
Once you’ve repaired this area (if it was needed), reverse the French seam back to its final position and sew along the second (outer) line of stitching. Carefully trim and clean up the repaired seam, and ideally, it will look as good as new!
Extra tip: Use a thread color and weight that is as close to the original as possible for a cleaner look.
Want More?
How to Get Started Sewing Clothes >>>
Have you used French seams in your sewing projects?
Let us know in the comment section!
Read NextWhat is a Serger?