Beginning Sewing Techniques: Learn the Basic Stitches
With this stitching tutorial for beginners, learn the types of stitches and how to sew them with ease!

You’ve figured out what type of fabric and threads to use, you have a pattern, and you are ready to start sewing. What comes next when you are learning how to sew? Learning the different types of stitches, of course!
If you want to learn how to sew, you need to know how to stitch. That's what sewing is all about. New sewists might be a bit confused when they use their machine when it comes to which stitch to use for a particular project or hem.
That is why we have asked Deby Coles from So Sew Easy to lend her expertise on learning how to stitch and that the difference is between all of those different types of stitches. New sewists are going to love this simple sewing tutorial for beginners. Beginning Sewing: Basic Stitches will show you everything you need to know!
Once you have finished reading this helpful article, you will be ready to sew just about anything you want to sew. Learning how to stitch is one of those basic sewing tips and tricks that will come in handy time and time again. When you understand what the different types of stitches are used for and know your stitching basics, you will be on the road to expert sewing!
When you've learned the basics of sewing, take your new skills for a spin! This collection of free sewing patterns has a beginner-level project for everyone, from refashioning clothes to stunning home decor to fanciful sewing notions.200+ Sewing Projects for Beginners (by the Minute!)
Table of Contents
Stitching Basics
The Regular Straight Stitch
The Zig-Zag Stitch
Decorative Stitches
Getting Really Good with Your Stitching
Other Sewing Machine Stitches
Interested in more helpful information and inspiration? Sign up for our free newsletter!
Stitching Basics
If you've read our earlier article on getting comfortable and familiar with your sewing machine, then you’ll now be eager to sew. But running before you can walk is a sure way to stumble and fall flat. Before you dive right in and start on your first sewing project with that beautiful piece of fabric, take the time to become familiar with and practice the stitches that your machine offers.
The Regular Straight Stitch
You’ll be using this stitch probably 90% of the time. The main purpose of the running stitch is to join fabric together at the seams. However, it is also used for topstitching seams and adding in decorative stitching lines to emphasize shape or strengthen a seam. You may also plan to use it for quilting.
However, to get a good result in sewing, a certain degree of accuracy with your stitching is essential. For example, if you sew one seam with a 1/4'' seam allowance and the next with a 1/2'' seam allowance, when you come to join those two pieces together, they aren’t going to fit.
So before you waste time and precious fabric, take time to practice your stitching, have some fun with it, and explore the wide world of options.
-
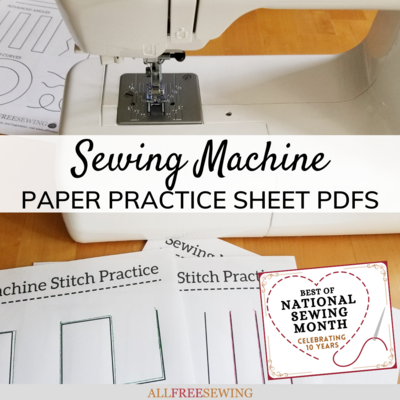
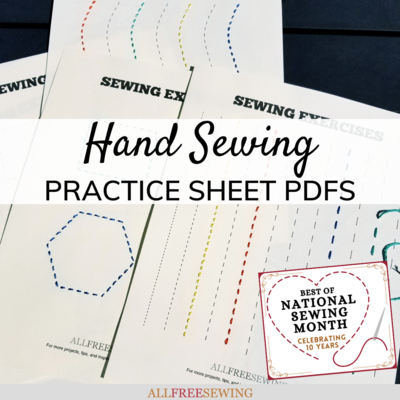
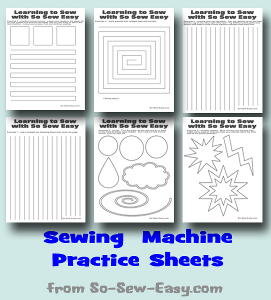
Start by downloading these Sewing Machine Practice Sheets, or draw up some of your own on regular printer paper. Sewing on paper is easier when you start out than sewing on fabric. You don’t even need to use a thread; the needle punches holes in the paper so that you can track your progress without using extra sewing materials. However, using a bright thread can still be fun, too, especially for children learning to sew.
-
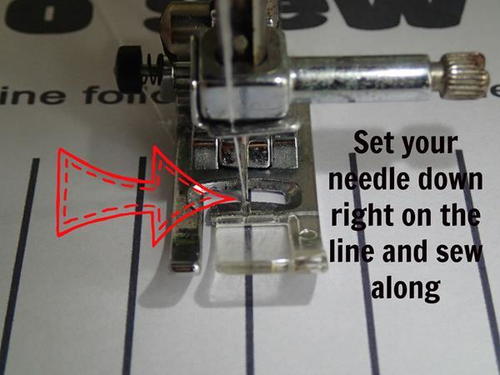
Practice putting your needle down exactly in the right place and sewing straight along one of the printed lines. See if your machine feeds through nice and smoothly or if it pulls just a little one way or the other.
-
Once you become more confident, try going a little faster. Can you still sew on the line? Some machines have a speed control slider, so you can set the speed control at a comfortable-yet-accurate speed.
-
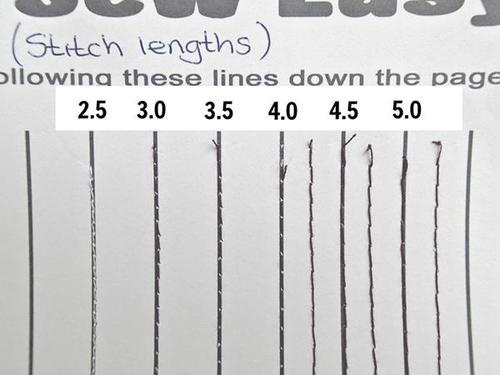
Now it’s time to explore some variations on the regular straight stitch. You can make a stitch reference chart by increasing or decreasing your stitch length and keeping a record. You might find it easier to stitch between the lines so that you can more easily see the length of the stitches. Bonus Challenge: can you stitch between the lines and still sew straight?
-
Keep your sheet with the different stitch lengths for reference later on.
The Zig-Zag Stitch
Used in all sorts of ways from neatening the raw edges to applying applique, the zig-zag stitch can vary both in length and in width, and it's another good stitch to practice.
-
Doing a zig-zag stitch is as easy as setting your sewing machine to the right settings. Once it's set to sew in a zig-zag, focus on keeping the presser foot as centered as possible so that your zigs and zags are even on both sides. Your presser foot may have a little mark at the center to help you; run this center mark down your main stitching line and your zigs and zags will be even.
-
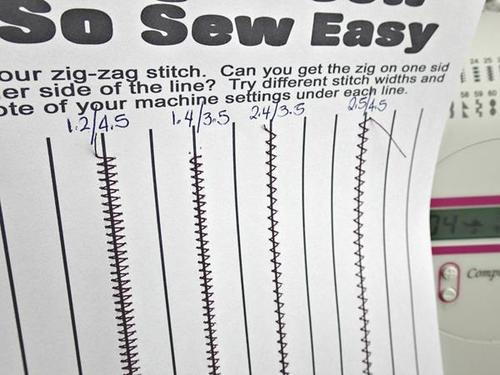
The zig-zag stitch can be varied enormously by changing both the stitch length (how far the fabric travels away from you between stitches) and the stitch width (how wide your zig-zags are across).
-
Once you have the hang of it, make a stitch reference chart with both long and short, wide and narrow stitches so that you can refer back to this in the future.
Decorative Stitches
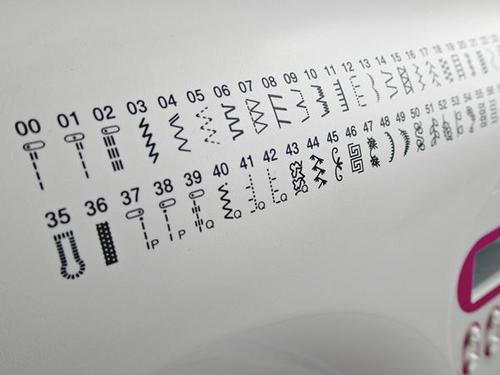
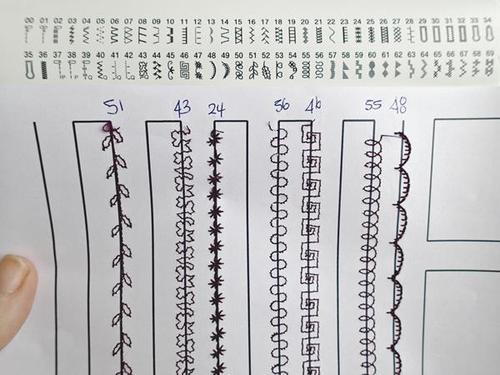
Does your machine come with 70 stitches or more? What a treat! Chances are that more than 60 of them are your decorative or embroidery stitches. These can be fun to play with, and they can be used to add a little personal touch to your projects, looking especially nice on quilted projects such as mug rugs and mini quilts, and on bags.
-
Your practice sheets will make a nice plain background where you can really see the detail of these stitches and keep them for future reference. Mark down your stitch number as you sew.
-
Some of the stitches may also be varied by changing both width and stitch length like you did with the zig-zag stitch. Experiment and have fun; no fabric is being wasted here!
Getting Really Good with Your Stitching
You’ve come a long way since you took your sewing machine out of the box for the first time. Are you now sewing faster and still sewing accurately? Then it’s time to really hone your needle skills to perfection with the advanced pages!
Practice turning corners, sewing around curves and sewing complex shapes. As you sew, consider the following:
-
Can you still stay between the lines?
-
Is it easier with the straight stitch or the zig-zag?
-
How do you turn corners with a zig-zag stitch? Should your needle be on the left or the right?
-
Can you gently pivot your work as you sew around those curves and still stay in the lines?
-
Can you pivot your work while also controlling your speed and making sure not to sew through your fingertips?
Did you tick off all of the elements on the checklist? Then congratulations! You’ve completed the stitching basics and are ready to move on to your first real sewing projects.
Before you do, remember to give your sewing machine a little cleanup and change your needle. Sewing paper is the same as sewing fabric and can leave dust and lint in your machine. Keep your machine clean for the best results, fewer tangles, and perfect tension.
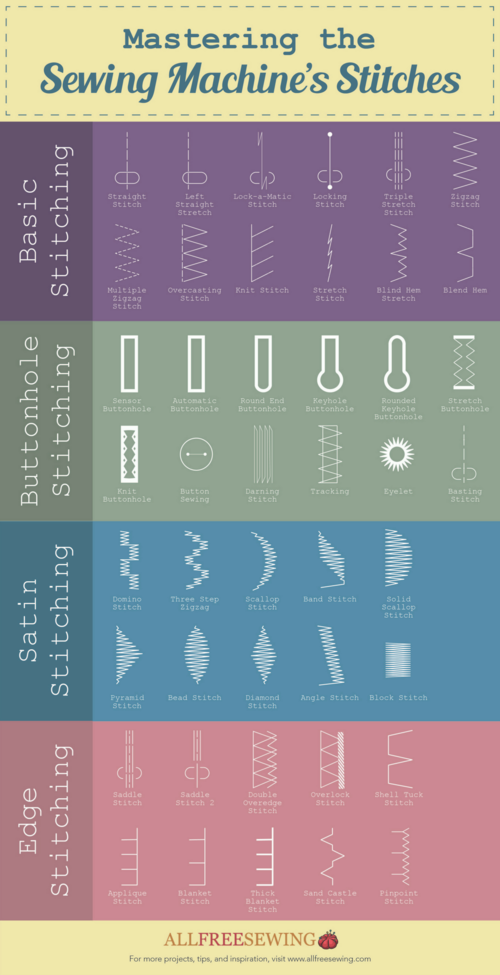
Other Sewing Machine Stitches
Though you've certainly learned a lot in this simple stitching guide, there's still so much to explore! There are many other types of stitches you can learn so that you can sew anything you set your mind to with ease.
-
Basic Stitching - Including the regular straight stitch and the zig-zag stitch you learned earlier in the tutorial, this category of stitches are mainly used to hold two pieces of fabric together, be they at a single seam or on top of one another like an applique.
-
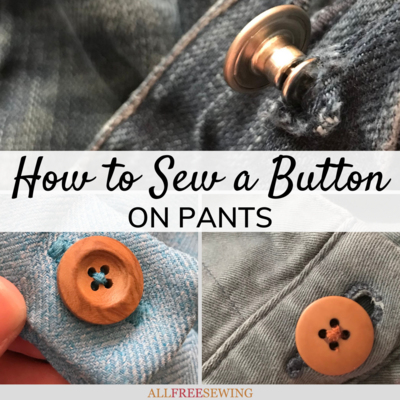
Buttonhole Stitching - As you may have guessed from the name, buttonhole stitches are meant to sew buttons into place or to reinforce the fabric around the buttonhole insertion spot.
-
Satin Stitching - This type of stitch is unique in that it sews thread to a fabric in such tight zig-zags that the thread effectively covers the fabric that it is sewed over. Satin stitching is popular for adding colorful designs, like leaves and geometric shapes, to the decorate the face of a fabric.
-
Edge Stitching - This type of stitch has a dual function of both decorating the perimeter of your fabric and keeping the edges from fraying. Prolonging the life of your piece significantly, edge stitching is a beautiful way to add durability to a piece of fabric.
Click here to download this different types of stitches pdf shown below. You can also click on the image below to enlarge or save.
Find more of Deby's tutorials and free sewing patterns on her blog, So Sew Easy, and on her designer profile here on AllFreeSewing.
Plus, to stay updated with AllFreeSewing, be sure to subscribe to our newsletter, Sewing It Up. You'll see the latest National Sewing Month pages and so much more.
Read NextWhat is a Serger?
Your Recently Viewed Projects
Thanks for your comment. Don't forget to share!
flowergirl
Jun 04, 2018
After I learnt how to hand sew, I was excited about using the machine but my mom just printed these sewing sheets and told me to practice. It's the easiest way for beginners and it doesn't waste your thread. You learn how to reduce and increase tension and basic stitches and their options. I highly recommend this step before practising on fabric.
Report Inappropriate Comment
Are you sure you would like to report this comment? It will be flagged for our moderators to take action.
Thank you for taking the time to improve the content on our site.