How to Use a Needle Threader
Learn how to use needle threaders for hand sewing to make getting started so much easier.

If you hand sew, then you are no stranger to the trouble of threading a needle. Struggle no more! Once you learn How to Use a Needle Threader, you will have the needle threaded in no time.
This page will outline the basics of needle threaders and then provide a tutorial for using one. If your needle eye of large, then you may not need a needle threader tool but otherwise, this sewing notion is a must-have.
A simple needle threader is inexpensive, which is why every sewist should own one. This reference page and tutorial is perfect for beginner sewists, but everyone could use a refresher in threading needles with this tool.
Once you start using a needle threader (and there are several options available), you will wonder how you ever got along without one. But, first, you need to learn how to use the different types.
Get the latest free sewing patterns and tutorials by signing up for our Sewing It Up newsletter!
Table of Contents
What is a Needle Threader?
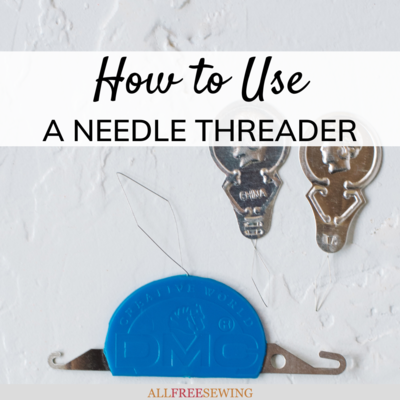
If you aren't familiar with this sewing notion, start here. A needle threader is a small handled tool that has a loop of thin wire. It is a tool used to pull thread through a needle.
However, as mentioned earlier, there is more than one type of threader.
Sometimes the handles are metal, like the two shown in the image below, and sometimes they are plastic as the third threader shown in the image below. As you can see, the metal threaders have only one loop. Plastic handled threaders can also have one loop or they can be like the one shown in the image.

The 3-in-1 threader tool has the thin wire for thread, a small hook for embroidery thread or light and medium weight yarn, and a larger hook for medium or heavy weight yarn. We have a tutorial for the hooks at the bottom of this page!
The size of the needle is incredibly important when using a needle threader. The reason the wire is so thin is that it's flexible enough to fit through tiny eyes. But, there are some so small that no threader can fit. The yarn hooks can only be used with large sewing needles or yarn needles.
It's a good idea to make sure your threader can go in and out of the needle eye before attempting to thread your needle. It's rare, but sometimes they get stuck.
There are also electronic, automatic needle threaders that you can buy to do it for you. Those are more expensive than the standard versions but it may come in handy if you don't have nimble fingers or need to work fast.
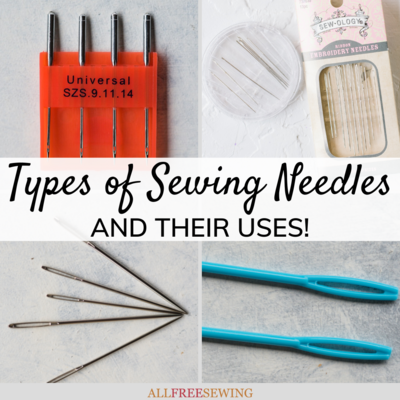
Types of Needle Threaders
There are many different types of needle threaders, including automatic, plastic, and metal threaders. There are even threaders that also cut the thread for you.
You will also find needle threaders for use with yarn instead of thread. There are needle threaders with special add-ons, such as lights and scissors, too.
The most common needle threader is the simple metal version, which is what we will be using for the tutorial.
However, we will touch upon using the others as well. Check out the tutorial below and follow the simple steps to thread your needle.
How to Use a Standard Needle Threader
We're sharing both a quick video and a picture-heavy tutorial. The video will show you one way and our written and picture tutorial will show you a slightly different method. The only big difference is the order you put the needle and thread onto and through the threader.
Materials Needed:
Needle
Thread
Needle Threader
Scissors
Visual learners! Click the play button to watch this video right below to see how to use a needle threader. We also have written directions with images after that. Follow along with the directions to learn how it's done!
- First, assure that both your thread and needle threader will fit through the eye of the needle.
Tip: If you are unsure of which needle to use for your project, take a look at our page on Sewing Needle Types.

- Cut the thread to the appropriate length for what you need (keep in mind if you're doubling. Also, a good rule of thumb is to cut twice the length you think you will use in one pass).
Tips: Some projects may need more thread than you will have on your needle at one time, but, remember, you have to pull the thread through entirely for each stitch when hand sewing.
Don't cut more thread than you want to pull through at once as it will take longer for you to work and there are more chances it will knot unexpectedly, causing you to start over anyway.
You can always tie off your thread and start fresh at the new stitch.
- Push the eye of the needle over the loop of the threader, all the way to the back of the loop at the threader base.

- Take your cut thread and push it through your needle threader loop. Pull it about a quarter-to-halfway through.

- Carefully pull the needle back out over the wire loop and the thread (for only a few centimeters).

- Pull one end of the thread through the eye of the needle (while still on the needle threader).

- Once your thread is through the needle, remove the thread/needle from the needle threader. Adjust the thread length on either side as needed. Tie a knot at one end and you are ready to sew!

How to Use a Heavy Weight Needle Threader
These directions are quite similar to the standard needle threader except that this is a hook rather than a wire loop. Follow our tutorial below to see how to thread thicker thread, floss, or thin yarn. In this tutorial, we will be using the smaller hook but the instructions are the same for both sizes.
- Choose a needle with an eye large enough to hold the thread/yarn.

- Cut the thread/yarn to the length needed for your project.
Tips: Cutting the thread/yarn may not be necessary for certain projects. If not needed, skip this step.
- Push the eye of the needle over the hook of the threader, all the way to the back of the hook at the threader base.

- Put the thread/yarn over the hook with enough on either side for it to stay hooked.

- Carefully pull the needle back out over the hook and the thread/yarn (for only a few centimeters).

- Pull one end of the thread/yarn through the eye of the needle. Unlatch the yarn/thread from the hook if needed.

- Once your thread/yarn is through the needle, remove it from the needle threader. Adjust the thread/yarn length on either side as needed. Tie a knot at one end (if applicable) and you are ready to sew!

Want More?
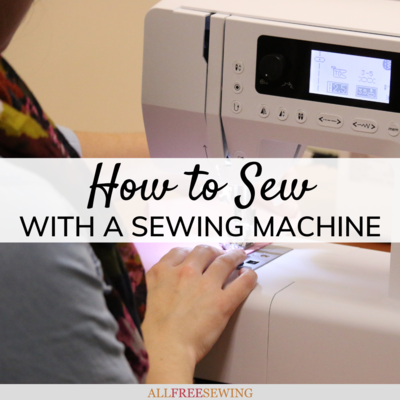
Read NextHow to Sew with a Sewing Machine
Your Recently Viewed Projects

Thanks for your comment. Don't forget to share!
CScarnegie
Oct 20, 2017
I LOVE using my little needle threaders. The person who taught me how to use them was actually my dad, and now I can't live without them! I've always wondered what the decorative faces were for though...
jadoredior
Oct 18, 2017
This tutorial is so helpful! I was given a needle threader by my aunt, but I've never actually used it. Thanks so much.
Report Inappropriate Comment
Are you sure you would like to report this comment? It will be flagged for our moderators to take action.
Thank you for taking the time to improve the content on our site.