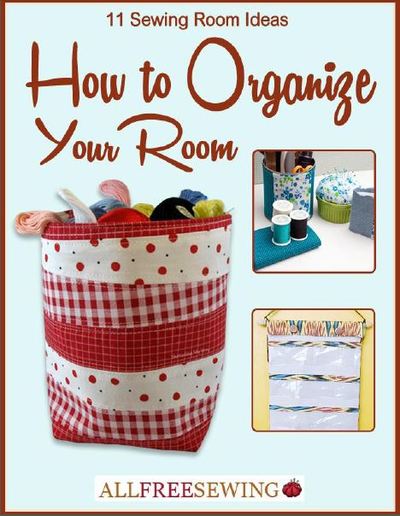
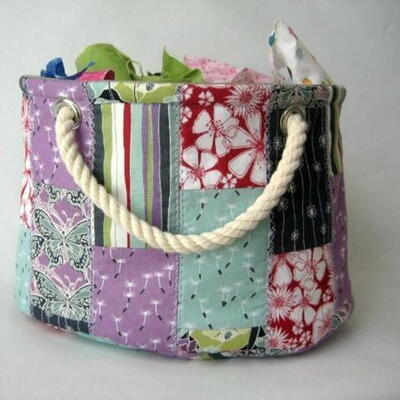
Fabric Storage Bin Tutorial
Make a DIY fabric basket that's so easy to sew up and incredibly handy to have around the house.

Finding storage that's both decorative and functional can be a hassle, especially for items that are awkward shapes, like baby diapers or TV remotes.
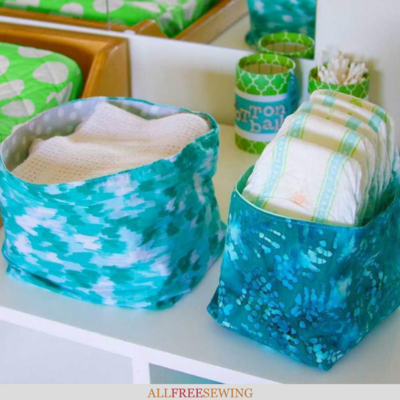
Search no longer for fashionable baskets that fit your unique storage needs with this Fabric Storage Bin Tutorial! Use these trendy DIY fabric storage bins for anything from baby supplies to bathroom toiletries.
We love any DIY storage bins but these are even better than most because of how simple they are to make.
You can even mix and match prints to match any room in the house! Lightweight, flexible, and able to be sewn in different shapes and sizes, these bins are a simple solution to any organizing ordeal.
Once you learn how to make fabric boxes, you will be set for keeping everything in the right places.
Sign Up For More Free Patterns >>>
DIY Cube Storage Bins Materials List:
- Assorted cotton prints (one for outer fabric, one for lining fabric)
- Pins
- Sewing machine and thread
- 8'' Fabric shears
- Rotary cutter
- Ruler
- Cutting mat (24'' x 36'')
Skill Level: Easy
Project Type: Make a Project
Time to Complete: Under an hour
Sewn By: Machine
How to Sew Fabric Storage Bins:
Follow this fast and easy fabric basket tutorial and you're bound to want to make more later. Change up the colors and you can make something customized for every room.
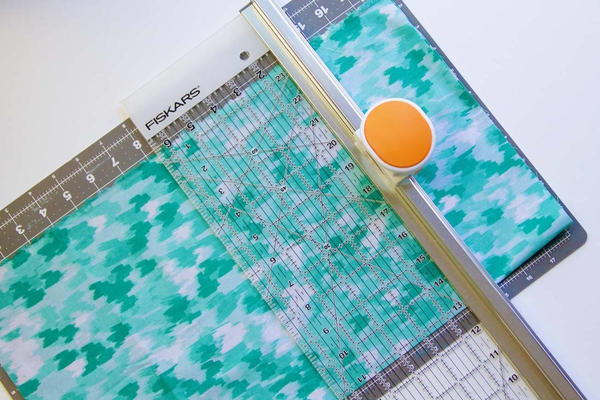
- With the rotary cutter, ruler, and cutting mat, cut your fabric into the appropriate sizes. For the larger bin, cut two pieces of contrasting print 30" x 15". One print will be the outer fabric and one print will be the lining fabric. For the smaller bin, cut two pieces of fabric measuring 24" x 12".
Tip: Using Fiskars' Rotary Ruler tool makes this cutting so easy because the blade is attached right to the ruler. This feature leads to more accurate cutting, especially when cutting multiple layers.
- Sew the short ends of the outer fabric together with right sides facing each other. Repeat for the lining fabric.
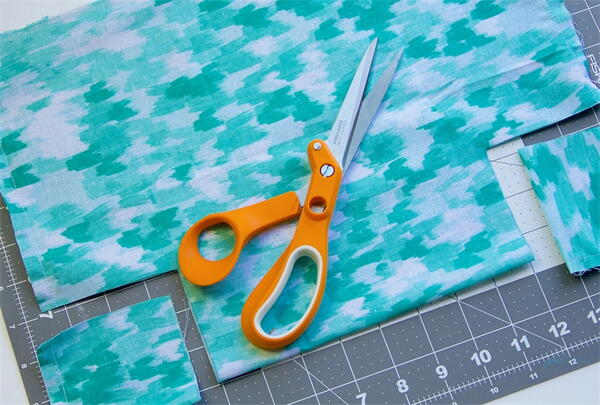
- For the larger bin, cut a 3" square from the two bottom corners of the sewing fabric, using the Amplify Fabric Shears. Repeat for the lining fabric. For the smaller bin, cut a 2-1/2" square from the bottom corner.
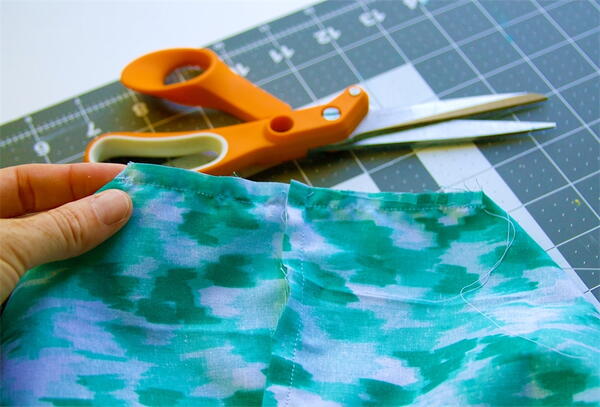
- Open up the fabric and sew the holes closed, matching the side seam with the seam along the bottom.
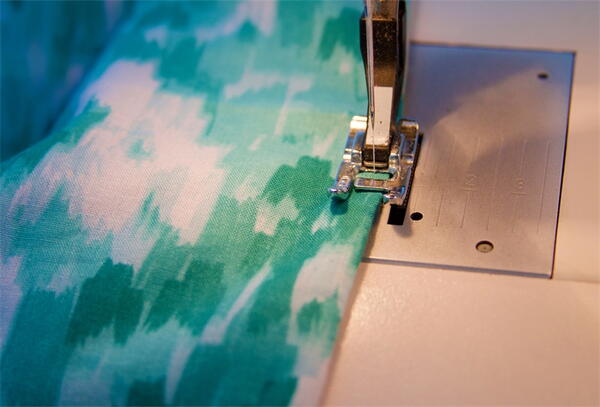
- Turn the lining fabric inside out and turn the outer fabric right sides out. Place the outer fabric inside the lining, so that the right side of the lining is facing the right side of the outer fabric. Pin the two fabrics together around the top edge. Leave a 5" hole in one edge and sew the two fabric pieces together.
- Turn the fabrics to the right side through the hole in the seam.
- Fill out the corners. Pin the hole closed and topstitch around the entire perimeter of the bins to finish.


Want More?
Sewing Room Organization: Your Complete Guide >>
Have any storage secrets to share?
Let us know in the comments.
Read NextChair Cover Sewing Pattern
Your Recently Viewed Projects
Thanks for your comment. Don't forget to share!
Cheryl E
Jun 28, 2018
Fabric bins come in handy so matter where they are placed. Perfect for holding onto folded face towels in the bathroom, or for corralling sewing notions, even on the nightstand to hold odds and ends. Make one and instantly see how easy they are to put together. Great scrap fabric project.
Report Inappropriate Comment
Are you sure you would like to report this comment? It will be flagged for our moderators to take action.
Thank you for taking the time to improve the content on our site.