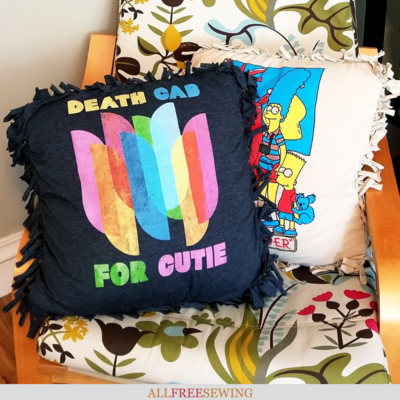
No Sew Tie Pillow Using a Shirt
Making a pillow from a tee shirt is a great way to repurpose a clothing item you'll never wear. Plus, it makes a great decorative addition to your home!

What do you do when you have a bunch of oversized t-shirts? Make no sew tie pillows using them, that's what!
With this tutorial, I'll show you exactly how to make a shirt pillow without sewing. I love sewing but, for this pillow, I thought a no-sew project was perfect.
This shirt pillowcase doesn't take long to make, especially with all the tips I have to share with you along the way.
This idea popped into my head after I had ordered a large tank top from a band's online store only to receive a 3XL t-shirt. They ended up letting me keep the shirt, so why not experiment with this thrifty idea I had?
It was so successful, that I dug out another oversized shirt I had in my drawer and knew I would never wear. This would make a fun and creative gift for any child, teen, or adult because the shirt can be anything!
Use old band shirts, free shirts from charity events, or use a solid craft or clearance shirt that can be made to complement your decor.
No Sew T-Shirt Tie Pillow
Project Type: Make a Project
Skill Level: Beginner
Time to Complete: Under an Hour
Sewn By: No-Sew

Materials List:
- Shirt (this tutorial used an XL and 3XL shirt for two pillows of the same size)
- Pillow form or polyfill stuffing (this tutorial used two 18" x 18" pillow forms) *See tips about this below!
- Scissors
- Rotary cutter and self-healing mat (optional)
- Clear quilt ruler or other measuring devices
- Ruler tape (optional) *See tips about this below!

Before We Start: Tips and Notes
Should I use a pillow form or stuffing?
It's up to you but the difference, to me, is noticeable in the final result. I've made pillows and other filled items using stuffing and it can be inconsistent, lumpy, and get worse over time. However, if you're making something that's an odd size, it's a great option.
Since this is a pillow, there are pre-made forms that work well. Pillow forms aren't much more expensive and are available in a variety of materials so you can choose what works best for you as far as filling and outside fabric.
What size pillow form should I choose?
It depends on the size of the shirt and if there is a design you want to feature. You need at least 2 inches for the ties from the edge of the pillow form (longer than that is up to you and the style you're looking for; 3 inches all around is preferred for ease of tying). For my 18" x 18" pillow form, I cut the shirt a little under 24" x 24", which is about 3" on each side.
Additional shirt size tips
Try to avoid the collar and seams, as they will alter the look of the ties. I was unable to avoid the collar and sleeve seams completely, but I tried to include as little as I could. Go smaller if your shirt design allows in order to avoid the collar, shoulder, or sleeve seams.
Should I use a rotary cutter or scissors?
Both are recommended. I found a rotary cutter easy and fast for cutting the base of the pillow, and then scissors for cutting the tie strips. If you don't have a rotary cutter, no problem. However, a pair of sharp fabric scissors is a must.
What is ruler tape?
One of the optional items in the materials list that I found helpful for this project was the iCraft PeelnStick Removable Ruler Tape (shown below). There are other brands of ruler tape. I happened to spot this in my craft drawer and it made the shirt pillow making process much faster and easier.
Not only for measuring and centering my main image but for easily cutting the tie strips. Feel free to make your own with removable tape and a ruler.

How to Make a Shirt Pillow Without Sewing:
- Lay out the shirt on a large, flat, solid surface. Make sure the back and front are even and as flat as possible (in the main section you are using for the pillow). Pin the two sides together if desired.
Note: The two sides should be kept together throughout this entire process.
- If you DO NOT need to center a design, proceed to Step 3. To center the design, measure and mark (with pins, tape, or a fabric marker/pencil) the size of your pillow base.
Note: In this case, my pillow form was an 18" square, so I measured and marked 18" for both the width and height to make sure my design was centered with nearly 3" allowances all the way around for the ties. For this design, it meant losing extra space above the top lettering and getting more at the bottom to avoid most of the shirt collar.

- Measure (and mark if desired), then cut 2-3" beyond the pillow base for the ties. Again, in this case, my main design and pillow base and form is 18" x 18" and so I measured out 3" on each side and cut. After removing the pieces cut off, I was left with a 24" x 24" square.
Tip: This is where a clear quilt ruler, along with a rotary cutter and self-healing mat are helpful tools for precision and speed.


- Cut out a square in the same size as your ties from each corner.
Note: In this case, the ties are 3" and so a 3" x 3" square was removed from each of the four corners.

- With the front and back still together, cut 1" strips all the way around.
Tip: This is where the ruler tape helps speed up the process for cutting. However, the cutting doesn't have to be perfect as long as they match as closely as possible.


- Knot (twice, so that it is secure) the two strips of each piece of fabric together all the way across. Do this for three of the sides. Keep one side open to stuff or to place the pillow form.

- Stuff until full or put the pillow form inside and center.

- Pull or adjust the pillowcase as needed. Finish tying the final side. You're finished!

No-Sew Tie Pillow Photo Tutorial
Below, you will find the photos for another pillow to see how it's done. The quick basic steps, from top to bottom, left to right:
- Gather materials for the shirt pillow. Lay shirt flat and pin.
- Measure and mark the pillow base.
- Cut each side.
- Cut 1" strips all the way around.
- Tie the strips together and stuff the pillow.
- Finished!


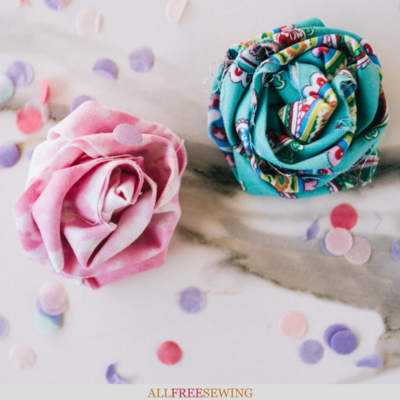
Want More?
Read NextUpcycled T-Shirt Flowers (No-Sew)