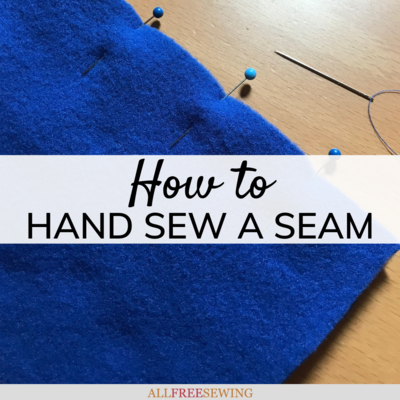
How to Hand Sew a Seam
With this guide, learn how to hand sew a seam shut on pants, shirts, skirts, and any other garment or seamed project!

Learn how to hand sew a seam with this full tutorial (and tips)! Seams are the most common way to attach two pieces of fabric to make a garment.
While most seams on clothing are made using a machine, sometimes they must be sewn by hand.
This can be the case if a fabric is very embellished or delicate, if it’s too bulky to fit under the machine, or if you simply don’t have a machine available! Additionally, repairs of torn seams can often be done by hand.
Whether you are a beginner, have only used a machine, or don't want to take it out for seaming up something you're working on or fixing a ripped seam on any sewn item, you will find this photo-heavy tutorial a fantastic how-to.
Sign Up For More Free Patterns >>>
Here are the basics if you ever need to stitch a seam without using a sewing machine:
When to Hand Sew Seams:
There are many instances when this skill would be necessary or required, including:
- If a sewing machine isn’t available (or not working) and a project is urgent.
- If you prefer to sew by hand rather than with a machine.
- To fix a ripped seam.
- When the fabric is very thick and won’t fit under the sewing machine foot. An example is attaching two pieces of faux fur fabric together (picture tutorial shown below).
- If the fabric is extremely delicate and would catch, bunch, or tear when sewn on a machine.
This includes material that has a lot of beads or sequins that can’t be sewn over so it must be finished by hand.
Suggested Materials for Hand Sewing Seams:

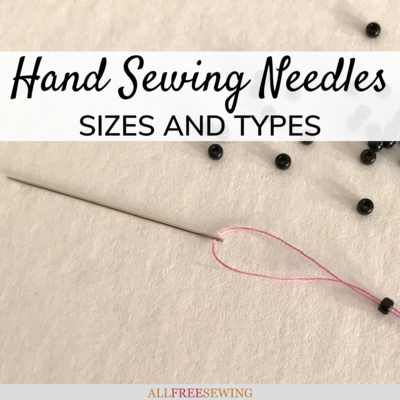
1. Hand Sewing Needles
Since the seam will be sewn by hand, needle selection is crucial. The needle should be designed for hand sewing, not be very thick or very fine, and have a pointed tip.
An all-purpose (sharps) needle will work for most fabrics, but it may vary by material type and thickness. Just like using a sewing machine, change out your hand sewing needle when it gets bent, overused, or damaged in any other way.
2. Thread
Thread choice is important here. A strong all-purpose polyester type will work in most situations, but different thread might be preferable depending on the fabric(s).
The color and weight of the thread should be very carefully considered if you are repairing a seam by hand. Try to match the original as much as possible in order to make the repair less visible.

3. Fabric Scissors
A quality pair of fabric scissors is another recommended tool for hand sewing. They are especially useful when fixing a torn seam. Fabric scissors will allow you to quickly and cleanly remove the old thread that will be replaced.
4. Small Scissors
In addition to a good pair of fabric scissors, you may want to also have a small pair of snips. Tiny sewing scissors will allow you to clean up threads and other debris that may be hard to reach with large fabric scissors.

5. Seam Ripper
A seam ripper tool can be used to remove any mistakes you might make when sewing a new seam by hand.
They can also help get rid of any loose or excess stitches before seam repairs are made. When using a seam ripper always take your time and be careful not to tear the fabric.
6. Thimble
The small (but mighty) thimble can help hand sewing go more quickly and neatly (while also saving your finger from hurting!).
They are available in different sizes and materials, from metal to ceramic to plastic. Metal is the most common kind used for hand sewing regular fabrics.
7. Clothing Iron
An iron will also be helpful when hand sewing seams and making repairs. It can remove wrinkles in fabric, allowing the stitches to be made more cleanly and evenly.
An iron can also be used to press open the seams after they have been sewn by hand. It's a useful tool to have for many reasons!

8. Pins
Straight pins are often used to hold fabrics together while hand sewing seams. After placing the edges together (with the "right" side of the fabrics facing inwards), evenly space pins along the seam.
Remove them as you sew along. Take extra care when pinning together sheer or delicate fabrics so the fibers don’t run or get damaged.
9. Measuring Tape or Ruler
A ruler or measuring tape is perfect for keeping your seam allowances even. When hand sewing a seam the "standard" seam allowances still apply (usually 5/8", 1/2", or 3/8" depending on the pattern or project).
Using a measuring device will allow you to double-check the size of your seam allowances as you hand sew.
Sewing Techniques and Tips:
Sewing a seam is slightly different than other aspects of hand sewing.
The following tips and photos will help you successfully make seams without a sewing machine:
- The stitches will most likely need to be in a straight(ish) line and should look relatively uniform.
- Practice your stitches beforehand on a scrap piece of fabric if it has been a while since you’ve handsewn.
- Neatness is more important here than usual, so take your time.
- Small, evenly-spaced stitches are the ideal result.
- Pins will help the fabrics stay put while you stitch.
- Reinforce the beginnings and ends of the seams with extra stitches, as well as the seam itself if needed.
- Double-check your seam stitches from both sides as you go along to make sure they don’t show on the outside of the garment.
- Unpick any mistakes very slowly and carefully using a seam ripper. Pay careful attention so the fabric doesn’t tear.
- Trim off any excess loose threads when you’re done sewing the seam by hand.
- Iron the fabric flat before and press the seam open after sewing (just as you would if these seams were being made on a machine).
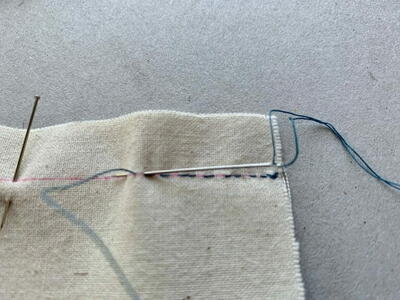
How to Hand Sew a Seam:
This picture tutorial shows you how to hand sew a seam using faux fur.


This picture tutorial shows you how to hand sew a seam using fleece.


Repairing Seams by Hand:
Another reason to hand sew a seam is to fix a torn or loose area on a garment. As mentioned above in the supplies list, the thread should match the existing thread on the garment if possible.
Most seams won’t be visible when an item of clothing is worn, but sometimes fabrics are sheer and the seam can be seen.
Almost all garments will have original seams that were sewn by a machine. Hand-stitched seam lines should be done more than once to provide lasting strength and reinforcement at the beginning and end.
Pins can be used to hold the fabric in place while stitching- just place them where they won’t cause damage to the material.
Want More?
How to Sew Two Pieces of Fabric Together >>
Have you sewn a seam by hand?
Any suggestions? Let us know!
Read NextHow to Sew a Button on Pants