iCozy Phone Loop Holder Sewing Tutorial
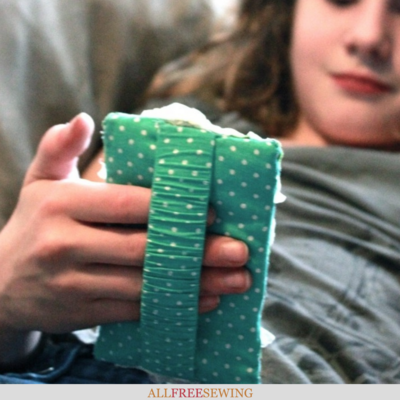
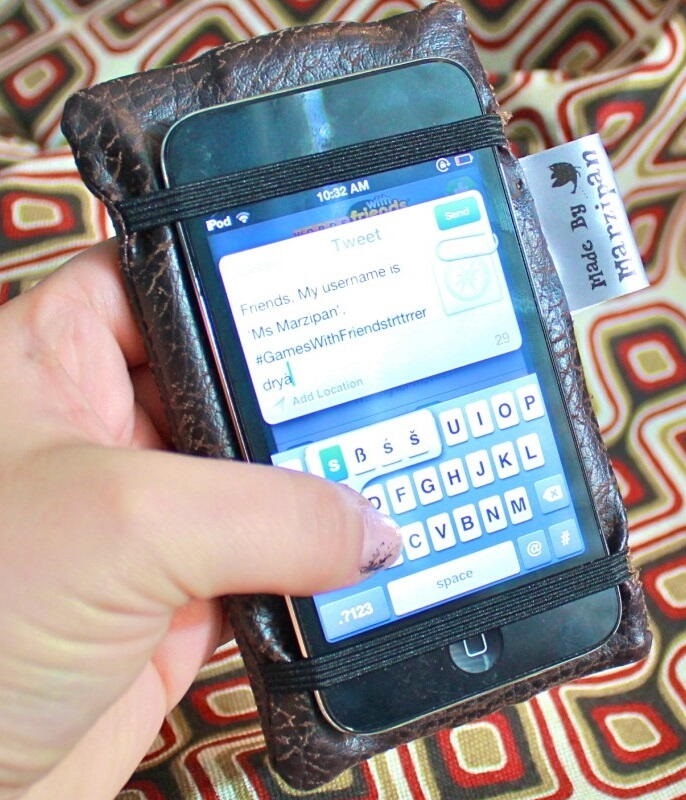
This awesome loop phone strap allows you to keep your phone attached and safe in your hand while texting, browsing, or playing games.
 Now you can keep your phone more secure when you're texting, browsing, or gaming. You can even let the kids play with your favorite (and expensive) gadget.
That's all because you'll have this amazing phone loop holder. Once you follow this tutorial, anyway.
The iCozy Phone Loop Holder Sewing Tutorial is a must-make for anyone who owns a smart phone. This iCozy fits around the back of the hand, giving the thumb freedom to use the device. Plus protects you from dropping it.
Use this free sewing pattern to create a homemade iPhone cover that's cute and useful.
Let Maureen Wilson walk you through each step. You'll also find a video tutorial for this project at the bottom of the page.
Sign Up For More Free Patterns >>>
Materials:
- Any 2 fabrics, 1/4 yd each
- 1-inch wide elastic (5 inches, may vary)
- 1/4-inch wide elastic (10-16 inches, may vary)
- Thin batting scraps
- Fabric adhesive spray
- Chipboard or cardboard
- Chalk

Instructions:
I’ve included measurements for the iPhone / iPod Touch, but the pattern can be adapted for an Android phone, Kindle, or any other device.
- Begin by cutting two pieces, one for the front and one for the back. Measure your device, and add 1 inch to the height (we’ll call this Measurement #1). Add 1.5 inches to the width. (iPod Touch / iPhone = 5.5 x 3.75 in.)
- Next we’ll cut the loop casing. It should be Measurement #1 multiplied by 1.5, and 2.75 inches wide. (iPod Touch / iPhone = 8.5 x 2.75 in.)
- Fold the loop piece in half lengthwise, right sides together, and fingerpress. Sew along the raw edge with a 1/4 inch seam.
- Press the seams open, and turn right side out. Rotate the seam to the center, and press again.
- Cut a piece of 1-inch elastic to the height of your device plus .5 inch. (iPod Touch / iPhone = 5 in.)
- Add a safety pin to one end, and thread it into the loop casing. Line up the elastic so it’s even with the top opening. Sew in place with a 1/8 inch seam.
- Use the safety pin to pull the elastic through the other end of the casing, lining it up with the opening. Sew with a 1/8 inch seam. Then, pull the other end of the elastic through the casing, lining it up with the bottom opening. Sew shut with a 1/8 seam. Put aside.
- Now, there are two ways you can add the elastic, so choose the method that doesn’t interfere with the use of your particular device. One way is to add elastic diagonally in each corner. The second is to add two elastic straps across the top and bottom of the device. I’ll show you the diagonal method first.
A) For this method, it’s helpful to add some chalk marks to your front piece. There is extra fabric on one long side, so we’ll be able to fold the edge in after adding the cardboard. To help center the elastic properly, draw a chalk line 1/2 inch from the right long edge. Then, mark the halfway point between the left edge and the chalk line. This is where your elastic pieces should cross.
Cut four pieces of 1/4 inch elastic, about 4 inches long. It’s a good idea to center your device on the front piece, so you can see how low to place the elastic. Add these at an angle in each corner, making sure they criss cross at the center mark. Sew these in place where they cross so they won’t shift during the following steps. Whether or not you’ll need to stretch your elastic before sewing will depend on how much give your elastic has, and how thick your device is. You want your device to fit snugly beneath the elastic.
B) To add elastic using the other method, draw the chalk mark 1/2 inch in from the right side.
Center your device between the left edge and the chalk mark, then pin pieces of elastic across the top and bottom. Sew them in place on the left side, using a 1/8 inch seam. Again, whether you’ll need to stretch your elastic before sewing the other end will depend on the give your elastic has, and the width of your device. Make sure your device fits snugly beneath the elastic.
Sew the right side of the elastic in place with a 1/4 inch from the chalk mark.
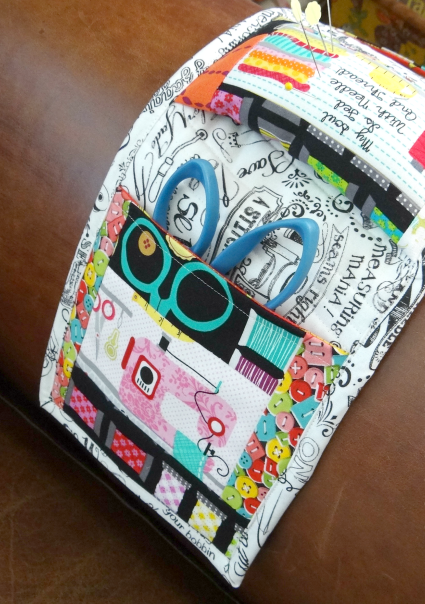
- I’m going to add a fabric label, but you can skip this step if you don’t want one. I purchased these from an online Etsy shop.
- Lay the loop piece on top of the front fabric piece, with the seam face up. Make sure it’s centered over the middle point. Tack the top only in place with a 1/8 inch seam. Don’t sew the bottom yet.
- Lay the back piece face-down onto the front piece. Right sides should be together. Pin the short side with the sewn elastic together. Pin the long left side shut as well. Sew those two sides only, with a 1/4 inch seam, leaving the bottom and right side open.
- Then, tug on the elastic and line it up with the raw edges of the open short end. Sew in place with a 1/4 inch seam. Trim off the excess elastic on the sewn sides.
- Turn the fabric right side out. Poke out the corner seams. Turn the strap so it’s on the back side.
- Cut a rectangle of chipboard or stiff cardboard. You want it to fit snugly inside the case, but minus about 1/4 inch of the width, so we can fold in the raw edges of the opening. (iPod = 4.75 x 2.75 in)
- Cut two pieces of batting to the same dimensions. Adhere one to each side with adhesive fabric spray. Slide into the case. Make sure your batting is lying flat by inserting the blunt end of a pencil into the case, and smoothing the batting down.
- Fold in the raw edges, tucking in the elastic, and handsew shut with a blind stitch.
Watch the video tutorial here: