Getting Comfortable with a Sewing Machine
From learning how to know which stitch to use on a sewing machine to beginner sewing tips, this in depth sewing tutorial is perfect for you!

Learning how to sew means that you will ultimately need to learn how to use a sewing machine. When you are a brand new sewist, this can be very overwhelming, especially considering how much a sewing machine can cost. These are not cheap tools and it is easy to worry yourself over using it wrong. This is a legitimate fear!
In Getting Comfortable with a Sewing Machine, Deby Coles from So Sew Easy gives you all the information you need to know to get acquainted with your new best friend!
There is no need, however, to feel anxious about sitting down at your machine. Once you get the hang of how to use a sewing machine and know what all those sewing machine parts do, you will find yourself sitting down at your machine for hours and hours of fun.
Once you read this informative and important article, you will feel comfortable as you learn how to sew with a sewing machine. It will not feel as intimidating to press down on that pedal and sew along once you understand what the parts of the sewing machine do and how to use them correctly.
You are just minutes away from being a sewing machine expert on your machine. Just keep reading to learn more!
Sign Up For More Free Patterns >>>
Getting Comfortable with Your New Machine
Great news! You are either new to sewing or you’ve got a new machine. Either way, it can be a little intimidating when you start out. There are so many buttons, knobs, feet, and stitches to choose from. Where do you start?
Let’s take a look through the things you want to be familiar with before you start to sew.
The Standard Presser Foot
Your machine may have come with an array of complicated-looking presser feet. Don’t worry too much about those other contraptions for now. You can come back to those when you are ready, and 90% of the time you’ll probably be using the standard foot. So let’s take a good look at it.
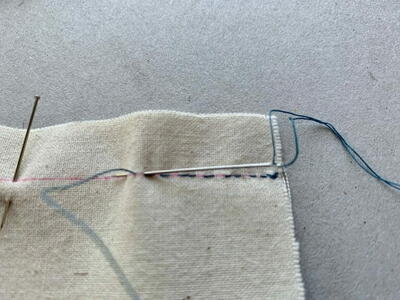
Your standard foot has a wide open area in the center to accommodate different needle positions and different widths of stitches. You’ll use it for most of your straight and zig-zag stitches and probably all of your decorative stitches, too. Take a look closely at all of the little marks on it. Those are there to help you line up your work and keep it straight.
Mine has a mark at the center for the regular needle position and also marks to the left and right to keep me on the straight narrow. Don’t forget you can also use the edge of the presser foot as a guide along the edge of your fabric too.
Tip: Put your needle down and measure the distance from the needle to the edge of the presser foot. Depending on your foot, it may give you the perfect 3/8th, or half-inch seam allowance.
Even if your machine doesn’t come with a whole bag of separate feet, you’ll probably have at least a zipper foot. There are several kinds and you may not be familiar with the one that comes as standard. Check out the different types of zipper feet and their uses here in Zipper Feet Explained.

The Machine Bed
Your machine bed will also be marked to help you keep on track and sew accurately. There may be marks at the front like the ones shown here. The first line is the stitching line and lines up with the needle position. Then there are marks at 1/4-inch, 5/8th, and 1 inch. By lining up the edge of your fabric with these marks, you can get accurate seam allowances and stitch in a straight line.

There will also usually be marks further back, etched into the throat plate of the machine. This one has a grid as well as the distance marks. Line up the raw edge of your fabric with the 5/8th of an inch mark at the front and back and you’ll get an even 5/8th of an inch sewn seam.

Sewing Machine Manuals
Who has time to read the manual? Well, unless you want to make mistakes and spend time with your seam ripper or ruining a project – you should make time to read the manual from cover to cover.
It will cover important information you need to know to keep your machine running smoothly such as how to clean and oil it, what to do when things go wrong, and basic user maintenance.
Plus, it tells you all about the machine's operation, the stitches, and the features. There may be fun features on your machine you don’t want to miss out on, and might not know are there, so do take the time.

The Many Many Stitches on a Sewing Machine
Remember the days when a sewing machine just made a straight stitch, and if you were lucky, it had a knob or button to turn to sew in reverse. We simply aren’t satisfied with those options today and now machines can have dozens or even hundreds of stitches.
But still, you’ll still only probably use no more than 5 or 6 of them in your regular sewing. Check out your manual and the stitch chart and identify:
1. The regular straight stitch
2. How to adjust needle position left and right if this is a feature on your machine – useful for sewing zippers
3. The zig-zag stitch
4. What stretch stitches there might be – such as the ‘lightning’ stitch or the triple stretch stitch or the triple zig-zag
5. What edge finishing stitches you might have such as the overcasting stitches
6. Any stitches for buttons and buttonholes.

Selecting the Right Stitch
Your machine may have buttons and a small screen like this one or it may have a knob you turn to select your stitches. Check your manual on how this works because there are a lot of different models out there.
Once you have selected your stitch, you can usually change it to suit the fabric or project you are working on, such as:
1. Making the stitch length longer or shorter
2. Making the stitch width wider or narrower
Be familiar with how to change the stitches from the standard size.

Other Machine Buttons and Knobs
Depending on its complexity, your machine may have an array of other buttons, knobs, bells, and whistles! This one is fairly straightforward but being familiar with all of the features means you’ll get the very best results.
Take your time to get to know your machine now for better results in the long run. Read the manual. If it comes with a DVD, as some of them do, then take the time to watch it.
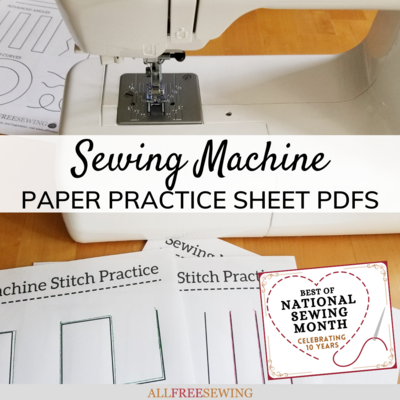
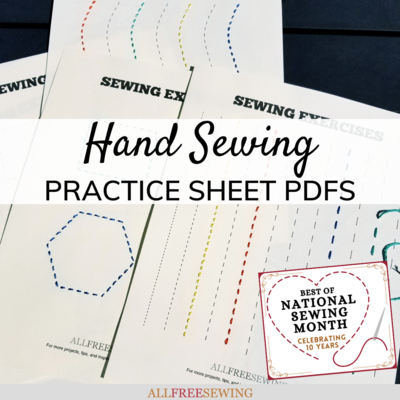
Then practice, practice, practice. Here are some handy sewing machine practice sheets you can use.

Want More?
Sewing Machine Paper Practice Sheets >>
What other sewing tutorials would you like to see on AllFreeSewing?
Let us know below in the comments!
Read NextHow to Sew a Button on Pants
Your Recently Viewed Projects
Thanks for your comment. Don't forget to share!
flowergirl
Jun 04, 2018
If you want to get comfortable using your machine but don't wanna read the manual then I suggest finding an online video tutorial that does that. It should be easier to read through the manual after you've gotten acquainted with the machine visually. The best part about this is that as you keep using your machine and referencing the manual you will understand every little detail.
LynM
Jan 04, 2017
This a good basic tutorial for beginner sewists. I totally agree with the writer who suggests that you should make time to read through your machine manual, but some of the little hints she has thrown in are not likely to be found in the manual. At the end of the tutorial is a link to a set of practice sheets, and I really wish I had found these when I first got my machine. What a great idea to learn to sew along lines and around corners around various shapes etc? This would certainly help to develop control
Report Inappropriate Comment
Are you sure you would like to report this comment? It will be flagged for our moderators to take action.
Thank you for taking the time to improve the content on our site.