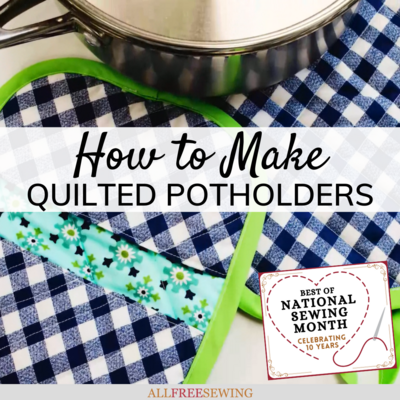
Cute and Easy Potholders to Sew
These DIY potholders are not only useful but super adorable and fun! With this full written and video tutorial, easy to make, too!

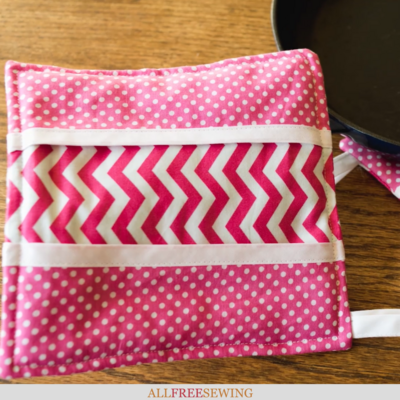
These Cute and Easy Potholders to Sew are just that! Even if you're a beginner, you can master these DIY potholders.
Plus, they'll make the perfect addition to your kitchen! This DIY potholder is super easy to make and has a dual-ended grabbing side meaning it's easier to pick up hot pots and pans. Not to mention, it's sew cute!
This sewing video tutorial shows you all about how you can make sure your potholder stays durable and in place no matter how many times you have to wash it.
Not a visual learner? Don't worry, we have a full written and picture tutorial as well. Learn how you can make your own handmade potholder when you watch this super helpful video tutorial!
Sign Up For More Free Patterns >>>
Skill Level: Easy
Project Type: Make a Project
Time to Complete: Under an hour
Sewn By: Machine
Materials List
- 8" square Therma-Flec heat resistant quilted batting, or cotton batting, or cotton batting and separate sheet heat resistant material
- Two 9" squares fashion fabric (watch the video for a note about an optional liner/barrier square of fabric to hide the batting underneath)
- Two pieces contrasting/coordinating fashion fabric 3" x 9"
- Extra-wide double fold bias tape in coordinating color – two 9” pieces and one 5” piece for hanger loop
- Thread
- Pins
- Optional: 1 9” square of neutral light-colored fabric to prevent see-through
Notes:
RS = Right side
WS = Wrong side

Cute and Easy Potholders Video Tutorial
Watch Mary Beth as she walks you through exactly how to sew these awesome potholders. She also offers tips on the batting and fabric to use. Spoiler alert: you can use fat quarters and fabric scraps for this project!
These lovely DIY potholders also make fantastic gifts for family and friends who love being in the kitchen.
After the video, scroll down for the written tutorial with pictures.
DIY Potholder Instructions
- Topstitch the 5" strip of bias tape closed along the open edge.

- With RS of contrast fabric pieces facing up, topstitch bias tape into place on each inside edge (because the pieces face each other, one piece will have bias tape on the left, and the other will be on the right).
Note: When sewing bias tape, make sure the slightly longer side is on the bottom.

- Stack fabrics as shown in video – (optional) liner fabric RS up, one 9" square RS up, two bias taped contrast pieces RS up with raw edges aligned with raw edges of 9" square, hanger loop folded in half near top right (or left) corner (optional), raw edges aligned with raw edges of 9" square, second 9" square, WS up. Pin/clip together.

- Sew all layers together, sewing around all four corners but leaving the center of one side open to turn it RS out. Lock stitches at beginning and end.
Note: The measurements provided allow for a 1/2" seam allowance.

- Clip corners and trim seam allowances.

- Turn RS out.
Pro Tip: When turning a corner, the easiest way to get it out neatly is to turn one side toward the back and one side toward the front when turning it inside-out.
- Insert Therma-Flec into the opening – silver side towards the back of the potholder/towards where the hot pan will be. Take your time to get it placed correctly!

- Close opening by hand using an invisible stitch.

- Topstitch all the way around, catching the batting, about 1/4" to 3/8" from the edges.

- For even more durability, push bound flapped sides back and topstitch a straight line through all the layers for about 4" or 5" inches under each flap to keep batting in place.

That's it. You're all set!


Want More?
20+ Delightful Dish Towel Patterns >>
What's your kitchen theme?
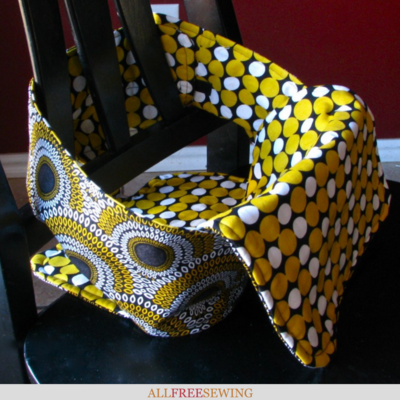
Read NextHow to Make a Travel High Chair
Your Recently Viewed Projects
Thanks for your comment. Don't forget to share!
MrsMac
May 07, 2025
Thank you for a fantastic item. It's a perfect stash buster. I have made several sets of these and find them indispensable now. The instructions are great and the project is very quick and easy to complete. I found the sizes given in the original pattern resulted in potholders that both my husband and I found were really large and felt clumsy to use, so I reduced the size of the squares.br /br /I have made a number of sets as wedding presents and they have been very well received.
buzzybee
Aug 31, 2017
This potholder makes a good beginner's project. To me, stuffing the heat-proof batting/filler a small opening in a seam is very difficult, as is turning the sewn pieces right-side out. I like to layer potholders as they will be when finished, and simply sew 1/4 inch from the edges. Then I bind the edges as I would a quilt edge with bias tape. You can do the entire thing by machine that way. A foot for attaching bias tape makes it really easy.
khanhski 6627993
Aug 04, 2017
Hi Marry Beth, Love your instructions. I would like to know where you got the clear plastic attachment that allows you to extend the surface area of your sewing surface. What is that clear plastic extender called? Thank you.
margiekins22
Jun 01, 2017
I am obsessed with how cute this pot holder is! I love everything about this potholder and can't wait to put my own spin on it!
Report Inappropriate Comment
Are you sure you would like to report this comment? It will be flagged for our moderators to take action.
Thank you for taking the time to improve the content on our site.