How to Unwrinkle Clothes: 10+ Ideas for Smooth Results
Find out how to unwrinkle clothes using everything from an iron to a tea kettle in this clever how-to guide!

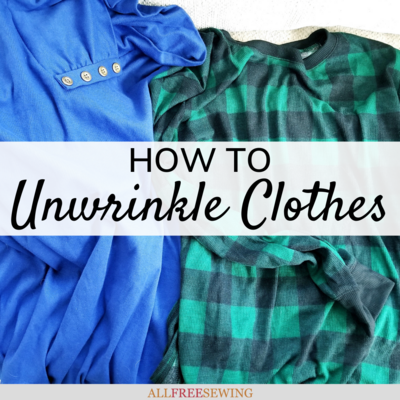
There are few things more frustrating than going to put on your favorite blouse and finding that it's crisscrossed with wrinkles.
Before you resign yourself to a day of looking disheveled, now you can learn how to get wrinkles out of clothes with everything from a traditional iron to a tea kettle.
Sometimes you don't have the exact tools you want or don't have the time to remove wrinkles but that doesn't have to stop you!
You don't have to fear putting clothes in your closet anymore. No wrinkle is a match for this comprehensive guide on the best way to iron clothes for every fabric, technique, and tool.
There are so many ideas. Some you'll expect and some that may surprise you. Whether you want to know how to use an iron or how to unwrinkle clothes in the dryer, this tutorial is for you!
Sign Up For More Free Patterns >>>
Table of Contents
How to Use an Iron - Settings
Using an iron is the most reliable way to give your garments a quick, fabric-safe, and crisp finish. However, using an iron can seem like a daunting task with so many settings, techniques, and high stakes for the safety of your clothing.
Take the stress out of your unwrinkling adventures! Ironing doesn’t have to be overwhelming with this easy how-to guide.
First of all, it's important to know how to set up your iron depending on what kind of garment is being unwrinkled. Since different fabrics require different ironing settings, most irons can adjust their heat level and steam.

According to the wikiHow article “How to Iron,” there are several rules of thumb to determine what settings to use for each fabric.
Heat
- Low Heat: Acetate, rayon, silk, and wool
- Medium Heat: Polyester
- High Heat: Cotton
Dampness
(Note: The word “damp” is used to indicate slight wetness. A fabric should never be fully wet or sopping while you iron it.)
- Damp cloth: When ironing lace or wool, place a damp cloth between the fabric and the iron.
- Damp fabric: Cotton and polyester fabrics should be damp before ironing. You can either spritz them with water before ironing or use your iron on a steam setting.
- Dry: Acetate, rayon, and silk should be ironed while dry.
Fabric Orientation
- Inside Out: Turn delicate fabrics inside out before ironing them to prevent burns. These materials include corduroy, linen, rayon, satin, and silk.
- Right Side Out: More durable materials—like cotton, polyester, acetate, and wool—can be ironed right side out.
When in doubt, follow the care instructions on the tag of the garment! Oftentimes these instructions will tell you what settings are required to safely iron the clothing.
There are also several possible materials and accessories necessary for sewing projects. Though most only require an iron and an ironing board, there are other materials that can be used for ironing purposes:
- Iron: A handheld instrument with a flat, heated bottom. This tool is used to get wrinkles out of fabric.
- Ironing board: A flat surface on which to use an iron. This space is usually treated or covered so that it is protected against heat.
- Pressing cloth: A piece of fabric placed between your sewing project and the iron so that the iron does not burn or mark your fabric.
- Seam roll: A rounded surface that helps to press seams open while ironing.
- Tailor’s ham: An oblong, curved, and stuffed pillow used to help iron contoured fabric patterns.
- Handheld or stand steamer: a device that heats up water and delivers steam through the opening to unwrinkle fabric (think high tech tea kettle).
How to Use an Iron - Instructions
- Once your iron is placed at the desired settings and you have collected the proper materials, place your garment on the ironing board and allow your iron to heat up.
Make sure your iron is never left face-down on the ironing board or on the fabric itself. When not in use, the iron should be propped upwards so that the bottom metal plate is facing towards the wall.
- When the iron is properly heated, glide it across the wrinkled area of the fabric. Don’t leave an iron too long in one place or it will burn the fabric.
- Iron the garment from the top to the bottom. For example, you should iron from the collar of a shirt to its hem or from the waistband of a pair of pants to the pant legs.
- Once you are finished using your iron, prop it back up into the resting position and turn it completely off.
- Allow the iron to cool for at least ten minutes before putting it away.

How to Get Wrinkles Out of Clothes Without an Iron
Though irons often work best to remove wrinkles from clothes, they can be a pain to set up, expensive to buy, and intimidating to use.
Luckily, there are many iron-free ways to quickly get wrinkles out of clothes.
These alternative unwrinkling methods are budget-friendly, fast, and super simple, turning common household items into makeshift irons in a matter of seconds!
These methods have been collected and tested in the wikiHow article “How to Remove Wrinkles from Clothes Without an Iron” and in Daniel Wroclawski’s Laundry Reviewed article “6 Ways to Iron Your Clothes Without an Iron.”
Beauty Tools
- Hair Dryer: Hang your garment and then blow dry it from about two inches away. Once your wrinkles disappear, switch your blow dryer to a no-heat or cool setting to keep wrinkles from coming back. This method is best for cotton-based clothing.
- Hair Straightener / Flat Iron: Make sure the plates of the straightener are clean so that there is no hair product or residue on them. If you’re working with a delicate fabric, use a lower heat setting.
If you’re working with a thicker, more durable fabric, you may set the flat iron to a higher setting. Gently run the fabric between the heated plates until the wrinkles go away.

Steam
- Shower Steam: Hang up your wrinkled garment in the bathroom while you take a hot shower. The steam will help loosen up wrinkles.
- Dryer: Throw a few ice cubes with your wrinkled clothing in the dryer and run the dryer on high heat for a few minutes. The steam produced from the heated ice cubes will loosen the wrinkles. Once the cycle is finished, hang the clothes up to keep the wrinkles from returning.
- Handheld (or larger) Steamer: These commercial devices provide a large amount of heated steam. To use the handheld steamer, read through the instructions.
Most will follow this procedure: fill with water to the line. Plug it in and turn on to power. After a few minutes, steam will release from the opening. To use, hang up garment or fabric and move steamer around until wrinkles are gone. Repeat as necessary.

Spray
- Water Spray: Lightly spritz the wrinkled areas of your clothing with water until it is damp. Lightly pull at the wrinkles. Hang the clothing until dry.
- Wrinkle Spray: Spray your wrinkles with specially made wrinkle sprays. Lightly pull at the wrinkles after spraying them, and let the garment hang dry.

Kitchen Tools
- Saucepan: First, lay out your garment on a flat heat-protected surface. Fill a small saucepan with water and boil water in it.
Dump the water and glide the bottom of the pot across the wrinkled areas on the fabric until the wrinkles disappear.
- Tea Kettle: Hang up the garment. Boil water in a tea kettle until it starts to steam, and then hold the steaming spout about a foot away from the clothing, moving it across the wrinkled areas.

Wet-And-Dry
- Rolling: Lay out the wrinkled garment and roll it up tightly so that the fabric is pulled taut. Then, place the rolled-up clothing under a heavy surface, such as a mattress for about an hour. Unroll the garment, and it is ready to wear.
- Damp Towel: Lay out the wrinkled garment on a flat surface. Dampen a towel and press it down firmly over the wrinkled clothing. Remove the towel and let the garment dry.
Do you have any unwrinkling hacks?
Read NextHow to Use a Needle Threader