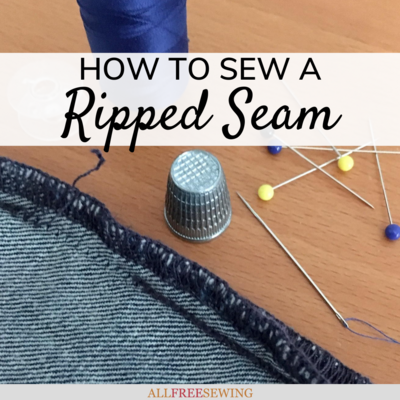
How to Sew a Ripped Seam
Learn how to sew rips in shirts, shorts, jeans, and more with this tutorial.

Rips and tears happen to everyone’s clothing, and the difficulty of repairing them depends on the location of the hole in the garment. Sometimes this happens where two cut ends of fabric are sewn together, known as a seam.
Surprisingly, along a seam is actually the most convenient place to rip your clothing! It’s much easier to repair than a hole in the middle of the fabric (as long as it doesn’t rip through to the outer part of the fabric). Use this How to Sew a Ripped Seam guide next time you're in need of ripped seam repair!
Whether you have a small hole in your favorite shirt or split the seam of your everyday jeans, you don't have to throw them out or spend money getting them professionally fixed. Do it yourself and get back to wearing it in no time. Follow along with these tips and tutorials for mending split seams on your clothing.
Sign Up For More Free Patterns

Review the Ripped Seam Damage
Before understanding how to sew a rip back up and doing any other sewing, you should look over the rip and come up with a strategy to fix it. Turn the garment inside out and assess the tear.
Are there just a few stitches that came out along the seam? Is the fabric on the right (front) side damaged or running? Is the seam open and flat or is it finished with an overlocking machine (also known as a serger)?
This will affect the way you repair the ripped seam. Taking a few minutes to plan out how to sew the hole up will pay off in the end.
Remove Loose Stitches and Excess Fabric
Once you’ve looked over the ripped section, use a pair of fabric scissors to carefully trim off any dangling threads or frayed and curling fabric that is in the way. Don’t cut off any of the fabric that is needed to close the seam, just any that is unusable. The less you remove the better, as this will help retain the original shape of the seam.
Removing excess material and threads will help prevent it from getting caught in your machine during the repair. It will also prevent the threads from becoming a mess along the seam as you stitch it up. Additionally, you may want to lightly iron the material if it is wrinkled. These preparations will make it much easier to sew the seam together.

Stitch the Seam Closed
Now you’re ready to sew the rip closed! This can be done either by hand or by machine. Using a sewing machine is typically much faster and the stitches will be more evenly spaced and stronger, but sometimes a seam on thick or delicate fabric is better to repair by hand.

Whether hand-sewing or using a machine the process is basically the same. The goal is to replicate the original line of stitching using a similar color of thread as was used before. As long as the fabric isn’t too damaged or frayed, this can be accomplished by following the line of stitch holes in the area that was ripped.
The garment should be inside out to best access the seam. Pin the two sides p the seam together if needed. Start your new line of sewing about .5 to 1” (inch) before the hole, and continue it after the rip to make sure it’s secure.
I also recommend backstitching at the start and finish. For extra strength, you might want to even go over the new seam stitches two or three times with your machine (or hand-sewing needle).
Many casual garments are assembled with seams that are simply overlocked together. This is typical in most t-shirts, leggings, and other sportswear. In this case, pin and then sew the ripped seam closed along the innermost edge of the overlocked area.
If you have a serger machine you can also use this to close the hole, but you do run the risk of trimming off too much fabric, leaving a wrinkled or uneven look.
Another option is to pin the hole closed and overlock the entire length of the seam again, but this can change the sizing of your garment (so you may want to do the same on the matching seam for evenness).
Press the Seam
This step will not apply to every garment you repair but can be useful in some instances. If you are working with a fabric that shouldn’t be ironed (like certain fake furs), skip this part or do a test piece beforehand.
For materials that can be ironed (like most cottons), pressing the seam can add a nice finishing touch to your repair.
While your garment is still inside-out, first press the seam from one side flat to smooth it, and repeat from the other side if needed. Then use your fingers to hold both sides of the seam down and press it open from the middle.
This will help eliminate bulk and give a smoother appearance once your garment is turned back to the right side.
Clean Up and Look Over the Repair
Now for the last step! Double-check your repair to make sure it’s totally secure and there’s no chance it will reopen. If there are loose threads or any other fibers these should also be trimmed off of the garment.
Also be sure to turn the garment back to the right side, assessing the look of the repaired seam. It should blend into the rest of the garment, making it hard to tell there was ever a hole there!
How to Fix an Overlock Stitch by Hand:
Watch it done! If you're looking for how to repair a ripped seam by hand, this visual example should help. Below you will see images showing the steps of fixing an overlocked stitch by hand.
- Assess the rip.

- Trim the excess fabric using sharp fabric scissors.

- Pin the fabric in place in order to sew the rip closed.

- Thread your needle with a matching color and carefully follow along the existing seamline to stitch the ripped seam closed.

- Once finished stitching, lock the stitch. Trim any extra fabric or thread.

How to Fix a Ripped Seam by Machine:
The visual example below shows fixing ripped seams in a pair of jeans using a sewing machine. You can sew ripped jeans by hand but because it's a thicker material, a sewing machine will be faster and more efficient. Always reference your manual for your brand's machine specifics. Otherwise, follow these general steps.
- Set up your machine with matching thread.
- Pin the ripped seam closed and align with the machine's needle.

- Follow the existing seamline to stitch up the hole. Remove pins as you go.

- Check the stitch to make sure the hole has been repaired.

- Trim any excess fabric or thread to finish.

- Turn out and press if needed.

Want More?
500+ clothing tutorials and patterns >>
Do you have any tips on how to sew a rip?
Let us know in the comments below!
Read NextHow to Sew a Button on Pants