How to Use Liquid Stitch
Liquid stitching is an easy way to repair, adhere, and seal fabrics and other fiber materials. Learn how to use it.

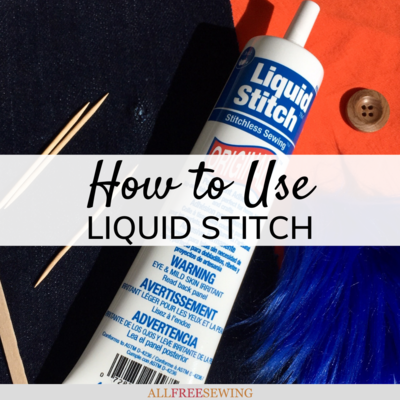
Many crafters have struggled with repairing small holes in fabric, using methods from hand-sewing them closed to placing patches on top. One easy solution is Dritz® Liquid Stitch™ Stitchless Sewing™ Original™ Permanent Adhesive.
It is designed to dry clear and to adhere to a variety of materials, from natural fibers like cotton to synthetic fabrics like faux fur and polyester. The best part- this particular liquid stitching product is widely available at sewing stores and online, and quite affordable. Utilize these helpful tips to repair your fabrics and more with Liquid Stitch™.
Because this no-sew solution has prompted a lot of curiosity in the sewing community, this guide will show you how to use Liquid Stitch™ in three different ways: repairing holes in fabric, as an adhesive, and sealing raw edges of fabric.
Whether you've been wanting to try it or want to know the best ways to use it for these common problems and techniques, these three tutorials will help you master this material.
Editor notes: This is not a paid review and all opinions for this Liquid Stitch™ review are our own. As with any product, read and carefully follow the instructions and safety warnings on the packaging before use.
Sign Up For More Free Patterns >>>

For Repairing Holes in Fabric:
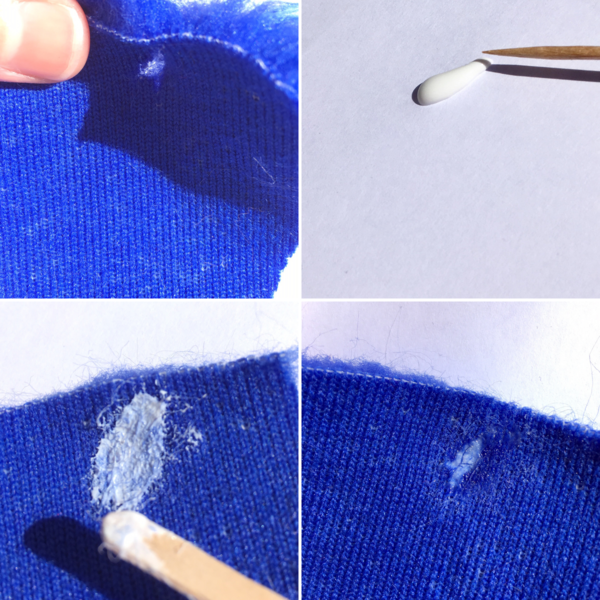
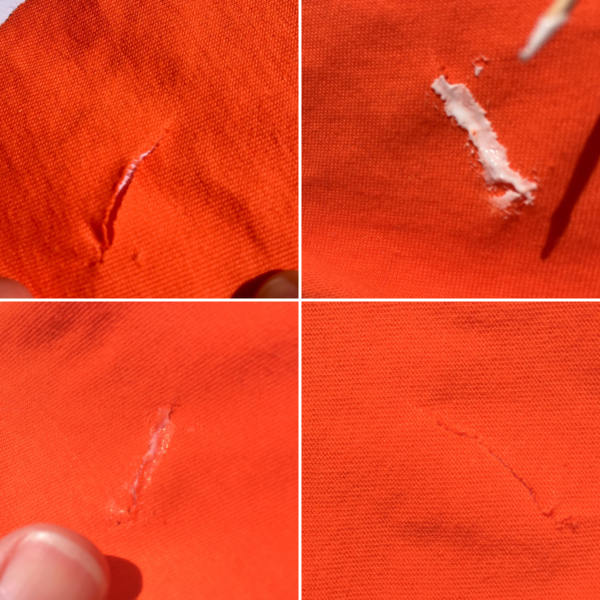
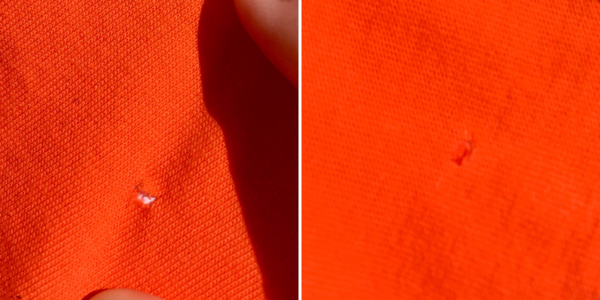
The primary use for Liquid Stitch™ is to close small tears or holes in cloth. It works best for long and/or small openings rather than large round holes because it is not creating a lot of “new” positive space like a patch but instead connects the raw edges. I've found it creates a very strong bond that holds together even when I pulled on each side, but the holes were still somewhat visible. It won't make your repaired area look brand new, but it will certainly prevent any additional widening (which is extremely important for prolonging the life of your fabrics). Follow these simple steps to fix a hole in cloth:
- Pre-wash your fabric (if possible) as recommended by the manufacturer. This will remove any dirt or lint as well as getting any shrinkage of the material over with before you use the Liquid Stitch™.
- Lay your garment or material out flat with the “right” (or front) side facing downwards, with paper or plastic underneath to protect your table. If it has two layers (like a sleeve) turn it inside out and put a piece of plastic or cardboard in between so the product doesn't seep through.
- Trim any excess frayed threads if they are in the way.
- Shake the tube before using.
- Squeeze some product out onto a piece of paper or scrap fabric.
- Using a wooden or plastic tool (like a toothpick, coffee stirrer, or plastic utensil), gently apply the Liquid Stitch™ to the back of your hole.
- Hold the sides of the hole or rip closed with your tool, fingers, or even a pair of tweezers to create a tight bond. It dries fairly quickly, so work at a fast pace.
- Excess product can be removed your tool and before it dries it is water-soluble, but after that it's considered permanent.
- After applying Liquid Stitch™ wait at least 24 hours before washing and using the fabric or garment.
It's also perfect for using around holes that you want to stay open but not continue to spread (like in a pair of jeans). Just place the product around the edges of the hole without connecting the negative space and allow to dry as usual.
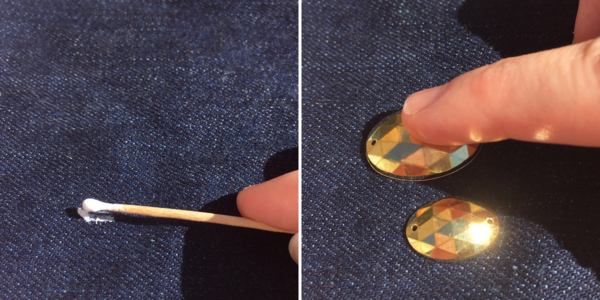
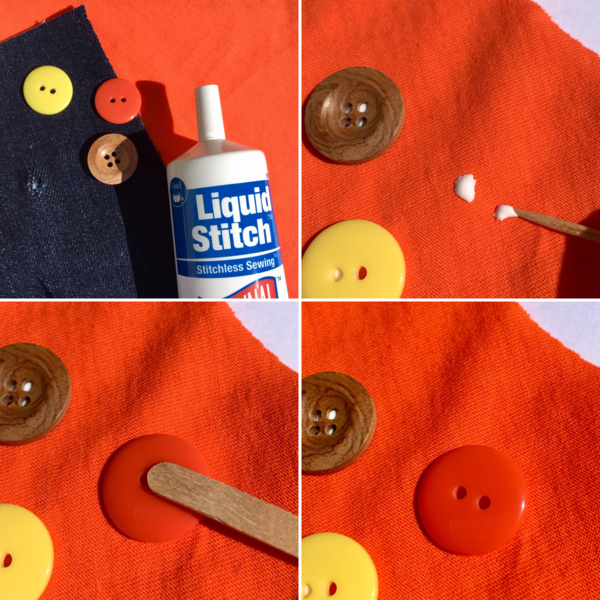
As an Adhesive on Fabric:
This product can also be used to glue sequins, paillettes, trims, buttons, embroidered patches, and other embellishments onto fabrics. This liquid fabric adhesive works best for attaching decorative (non-functional) elements, so I used it to adhere buttons that will not actually be used in the traditional way (but instead just for looks). Here are the steps for using Liquid Stitch™ as an adhesive:
- Place your fabric flat on your workspace, right side up. You may want to place paper or plastic under it in case some goes through to the other side.
- Shake the tube before using.
- Use the tube or a toothpick (or similar tool) to apply the Liquid Stitch™ to your fabric where you want to attach the embellishment. Don't use too much that it will seep out the sides, and if your decoration has holes (like a button) dot the product onto areas where the holes don't show through. It dries relatively clear, but like most glues, if there is a hole in the embellishment it will be slightly visible within that space.
- Place the decorative element onto the adhesive and gently press down to affix.
- Allow it to dry for 24 hours before using your decorated fabric.
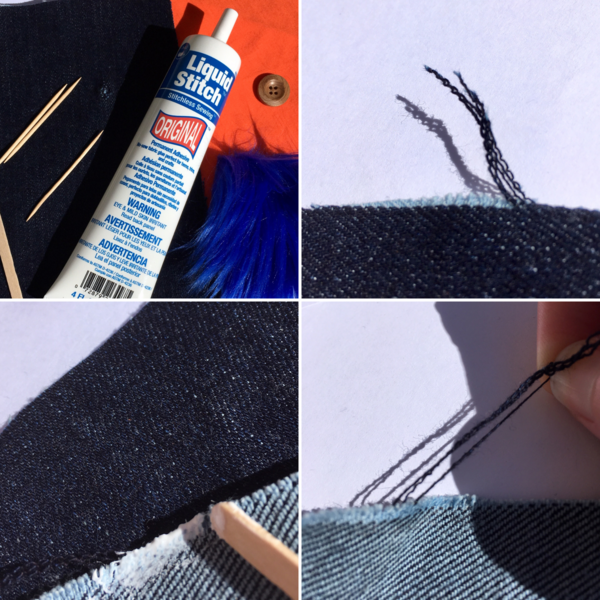
To Seal Raw Fabric Edges:
Finally, it can function as a sealant to prevent the fraying of raw edges. Liquid Stitch™ works really well on fabrics like denim that tend to come apart when cut and left unfinished. When applied to a fraying piece of denim it stopped the blue fibers from pulling out and dried clear in a short amount of time. To seal raw edges (or similarly learn how to use Liquid Stitch™ for hemming), do the following:
- Place your material's raw edge with the right side facing downwards. Work on a piece of paper or plastic to prevent it from getting on your table (note: I used a piece of denim underneath for contrast in the photo below).
- Cut off excess loose threads (unless you are going for a distressed look, then you can leave them).
- Shake the tube before using.
- Squeeze some product onto a piece of paper or scrap fabric.
- Use a toothpick (or similar tool) to carefully apply the Liquid Stitch™ to the raw edge. Don't use an excessive amount (you can always add more). Smooth it out so it's fairly even.
- Allow it to dry for 24 hours.
As you can see there are many uses for this amazing product. Enjoy using Dritz® Liquid Stitch™ in your crafting!
Want More?
15 Tools for the No-Sew Crafter >>>
Have you ever used a liquid stitching product? What's your favorite?
Read NextFabric Flower Headband Pattern